
|
Do it yourself
| |||
| ||||


How to adjust the position lights on the Peugeot 208
Model: Peugeot 208
A9, MK 1
- Years 2012-2019
In this video, we can see how to adjust the low beams on the Peugeot 208: we can do this operation with the adjustment screw that we find on each front headlight, opening the front hood: above each headlight group we will in fact find a white screw that will allow us to perform the operation; the low beams must be positioned between 50 and 120 cm from the ground and no more than 40cm from the outside of the vehicle, at least 60 cm apart. The adjustment is done with the vehicle empty and the tires well inflated, with the car positioned on a flat surface, facing a wall. Turn on the low beams and measure the distance of the light from the ground with a tape measure; Transfer this measurement to the wall using a piece of horizontally placed adhesive tape, then indicate the center of the headlight projection on the wall with a cross. Measure the distance from the center of the cross to the ground: it must not exceed 1.06 m. Repeat with the second headlight.
Posted on 21 December 2024 by ScegliAuto
Video tutorial
Related tutorials
Peugeot 208
(2012-2019 /
A9, MK 1)
Let's see this very short video, which however gives us an indication of where the headlight adjustment of the Peugeot 208 is located: we open the ho…

Peugeot 208
(2019-2026 /
UB, UJ, UP, MK 2, UW)
In this video, we see how to adjust the height of the front headlights of the Peugeot 208. It is advisable to use the inner wheel located at headligh…

Peugeot 208
(2019-2026 /
UB, UJ, UP, MK 2, UW)
In this video, we see how to adjust the height of the headlights of the Peugeot 208: when it comes from the factory, the headlight adjustment is a bi…
Other guides you may be interested in
|
How to reset the tire pressure sensor of the Hyundai Tucson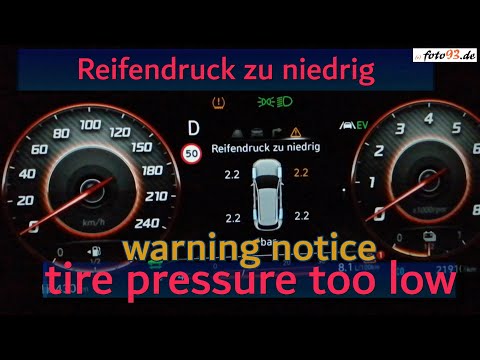
Below we will discover the instructions that will allow us to reset the tire pressure warning light (TPMS) of the Hyundai Tucson. First of all, we get into the car and turn on the instrument panel; then we go to the vehicle settings until we reach the tire pressure monitor, identifying the tire with the incorrect pressure. At this point, we proceed to restore all tire pressures, following the pattern indicated on the label; in this way the TPMS system will be reset and the warning light will be reset by the instrument panel! by ScegliAuto More videos
|

|
For advertising on this site Write to info@scegliauto.com
ScegliAuto is not responsible for any inaccuracy of the data in the lists. To report any inaccuracy or your business (if you own the business in question), please write to info@scegliauto.com
Number of seconds to generate the page: 0.180
(c) ScegliAuto 2026 - info@scegliauto.com - Privacy policy VAT number: IT01247470535 |
