
|
Do it yourself
| |||
| ||||


Replacement of Front Bumper
Model: Peugeot 206
MK 1
- Years:
1998, 1999, 2000, 2001, 2002, 2003, 2004, 2005, 2006, 2007, 2008, 2009
Video tutorial
To replace the front bumper, it is advisable to first position the vehicle on appropriate car stands and remove the front wheels. Start by removing the front grille that bears the manufacturer's emblem, then proceed to detach the headlights by disconnecting the respective connectors (if any plastic tabs that secure the headlight to the front cross member are broken, a headlight repair kit can be used or the entire headlight replaced). Finally, unscrew the various fixing screws of the bumper, including those under the wheel arches, and remove the bumper by also disconnecting the fog light connectors. Then, reverse the process to install the new bumper, transferring any necessary elements from the old one.
Updated on 15 February 2026 by ScegliAuto
Related tutorials
Peugeot 206
(1998-2012 /
MK 1)
Today, let's see the step-by-step instructions on how to disassemble and replace the front bumper grille of the Peugeot 206. First, we open the hood …

Peugeot 206
(1998-2012 /
MK 1)
Below we will see the instructions on how to disassemble and replace the front bumper of the Peugeot 206. First, let's open the vehicle's hood and st…
Peugeot 206
(1998-2012 /
MK 1)
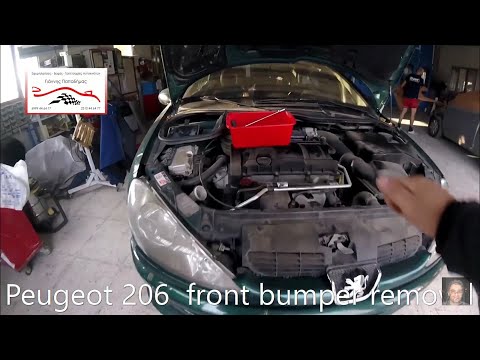
Is the front bumper on your Peugeot 206 due for replacement? Here’s how to remove it. Lift the bonnet and secure it. Remove the cover above the front…
Other guides you may be interested in
|
How to Remove the Rear Seat of a Hyundai Tucson?
To remove the rear seat of a Hyundai Tucson, follow these steps. Start by moving the front seats to their most forward position to gain space. Next, locate the release lever on the underside of the rear seat, near the floor. Press this lever down while pulling the seat upwards to unlock it from the anchor pins. Once unlocked, tilt the seat upwards and forwards to remove it from its position. Repeat this process for both sides of the rear seat. Be careful of any electrical cables or components that may be connected to the seat during removal. Once the rear seat is removed, the disassembly is complete. by ScegliAuto More videos
|
|
For advertising on this site Write to info@scegliauto.com
ScegliAuto is not responsible for any inaccuracy of the data in the lists. To report any inaccuracy or your business (if you own the business in question), please write to info@scegliauto.com
Number of seconds to generate the page: 0.039
(c) ScegliAuto 2026 - info@scegliauto.com - Privacy policy VAT number: IT01247470535 |
