
|
Do it yourself
| |||
| ||||


Replacement of electric window regulator and motor for Seat Leon 1.
Model: Seat Leon
1P
- Years 2005-2013
Let's see how to replace the window regulator and motor on a Seat Leon 1: we remove the panel, remove the seals and disconnect the motor connector. The mechanism has 10 fixing screws that we need to remove; we also remove the glass supports, and detach the adhesive tape. We temporarily connect the new motor, which we can find on tarostrade. It has the code 251-0620-N-100214 at the price of 25.29 euros + 6.49 euros for shipping; we use the window regulator to position the supports in front of the inspection wells, then disconnect the motor. Now we proceed with the final assembly by putting back the silicone seal, repositioning the central locking cables, inserting the rubber guide rings for the cables, positioning the inner panel and connecting the central locking socket. We slide the glass into the supports, which we tighten without overdoing it. We reconnect the motor (and test its operation). We reconnect the electrical connectors, put the cables back in place, reassemble the seals, the panel, the handle cover and the support screws. It is a job that requires patience and a couple of hours available, but it saves all the labor costs.
Posted on 7 October 2025 by ScegliAuto
Video tutorial
Related tutorials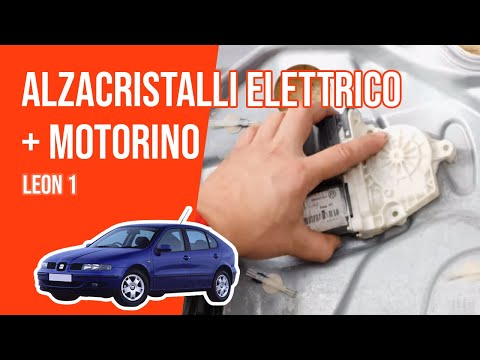
Seat Leon
(2005-2013 /
1P)
In this video, you will see how to replace the electric window regulator on the Seat Leon 1P: you need to remove the inner door panel by taking off t…

Seat Leon
(2005-2013 /
1P)
If one of the window regulators in the Seat Leon stops working, the first thing to do is check the corresponding fuse; this video shows its location.…

Seat Leon
(2012-2019 /
MK 3, 5F)
Let's see how to repair the fuel filler cap on a Seat Leon: it remains in the "unlocked" position even when the car is locked. The cause is almost al…
Other guides you may be interested in
|
How to Replace the Battery on a Honda Vision 110
To replace the battery on a Honda Vision 110, you need to remove the front fairing of the motorcycle, located directly under the front headlamp. To loosen this panel, unscrew the two screws found at its top, just below the handlebar. Once these screws are loosened, lever under the panel to detach it, gaining access to the battery underneath: this battery must be removed from its housing by unscrewing the fixing screws and disconnecting the power cables, replacing it with a new one. by ScegliAuto More videos
|

|
For advertising on this site Write to info@scegliauto.com
ScegliAuto is not responsible for any inaccuracy of the data in the lists. To report any inaccuracy or your business (if you own the business in question), please write to info@scegliauto.com
Number of seconds to generate the page: 0.407
(c) ScegliAuto 2026 - info@scegliauto.com - Privacy policy VAT number: IT01247470535 |
