
|
Do it yourself
| |||
| ||||


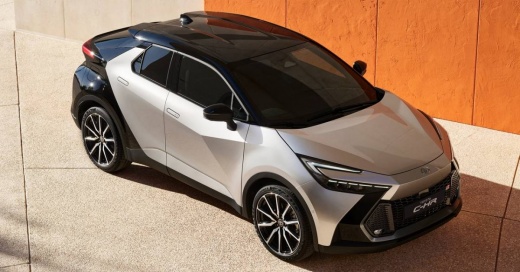
How to replace the hybrid battery fan filter in the Toyota CHR.
Model: Toyota C Hr
MK 2
- Years:
2023, 2024, 2025, 2026
Video tutorial
The operation described in the video is very simple and often overlooked, ensuring the health of the hybrid battery in our Toyota CH-R. The filter is located under the rear seat on the passenger side. We will need to lift the seat cushion (pulling up the front part) to access the battery compartment. The cover is secured with cross screws and retaining clips. We will then see the dark-colored filter. We purchased it on Amazon with the code B0FPMRS56C for the price of €12.93, with free delivery in 7 days. Let's insert it with the same orientation as the one we removed and then reattach the cover. Be careful not to touch the terminals or the orange cables of the hybrid battery, which are high voltage. It is advisable to perform this operation at least every 40,000 km or 2 years.
Posted on 20 December 2025 by ScegliAuto
Related tutorials
Toyota C Hr
(2016-2023 /
Ax10, MK 1, Ax50)
Go under the right rear seat. Remove the clip by unscrewing it with a screwdriver and then take off the fixed plastic cover. Clean the now-exposed fa…
Toyota C Hr
(2016-2023 /
Ax10, MK 1, Ax50)
This short video tutorial shows how to change the battery of the key remote for a Toyota CHR. The operation is very simple and requires no tools. Tak…
Toyota C Hr
(2016-2023 /
Ax10, MK 1, Ax50)
In this brief video tutorial, learn how to replace the remote battery of a Toyota CHR. To start, extract the physical key from the remote. Push the r…
Other guides you may be interested in
|
How to Remove the Rear Seat of a Hyundai Tucson?
To remove the rear seat of a Hyundai Tucson, follow these steps. Start by moving the front seats to their most forward position to gain space. Next, locate the release lever on the underside of the rear seat, near the floor. Press this lever down while pulling the seat upwards to unlock it from the anchor pins. Once unlocked, tilt the seat upwards and forwards to remove it from its position. Repeat this process for both sides of the rear seat. Be careful of any electrical cables or components that may be connected to the seat during removal. Once the rear seat is removed, the disassembly is complete. by ScegliAuto More videos
|
|
For advertising on this site Write to info@scegliauto.com
ScegliAuto is not responsible for any inaccuracy of the data in the lists. To report any inaccuracy or your business (if you own the business in question), please write to info@scegliauto.com
Number of seconds to generate the page: 0.063
(c) ScegliAuto 2026 - info@scegliauto.com - Privacy policy VAT number: IT01247470535 |
