
|
Do it yourself
| |||
| ||||


How to replace the alternator of a Volkswagen Golf?
Model: Volkswagen Golf
MK 3, Golf III, Golf 3
- Years:
1991, 1992, 1993, 1994, 1995, 1996, 1997
Video tutorial
Replacing the alternator of a Volkswagen Golf requires some fundamental steps. First of all, make sure to disconnect the negative battery cable to avoid short circuits during the process. Once you have done this, safely lift the vehicle to access the engine compartment. Locate the alternator and remove the drive belt, which is connected to the alternator pulley. This operation may require a specific tool to loosen the belt tensioner. After removing the belt, it is time to disconnect the electrical wiring of the alternator. There will be at least one power cable and one or more electrical connectors to disconnect. Be careful to remember their positions for reassembly. Next, unscrew the bolts that secure the alternator to the engine and remove it carefully. Once the old alternator is removed, insert the new one following the reverse order: secure it with the bolts, connect the electrical wiring, and reassemble the drive belt. Finally, reconnect the battery and start the engine to verify that the alternator is functioning correctly.
Posted on 7 May 2025 by ScegliAuto
Related tutorials
Volkswagen Golf
(1997-2003 /
Golf IV, Golf 4, MK 4)
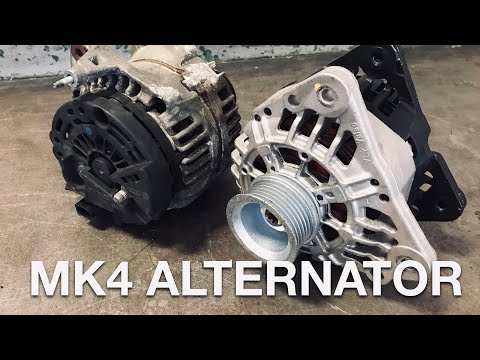
These brief and simple steps will show us the process of disassembling and replacing the alternator of the Volkswagen Golf 1.6 16V. First, we open th…
Volkswagen Golf
(1997-2003 /
Golf IV, Golf 4, MK 4)
This video shows how to remove and replace the alternator on a fourth-generation Volkswagen Golf by following these simple steps. First, open the bon…

Volkswagen Golf
(1997-2003 /
Golf IV, Golf 4, MK 4)
The following steps will guide us through the process of disassembling and replacing the alternator of the Volkswagen Golf 1.9 TDI. First of all, we …
Other guides you may be interested in
|
How to Reset the Tire Pressure Light on a MG ZS?
On the instrument cluster of the MG ZS, the tire pressure light that appears can be reset by inflating the tires to the correct pressure: this value will be indicated on the sticker attached to the driver's door pillar. Once the tires have been properly inflated, you can turn on the instrument cluster and navigate through the menu until you find the option that indicates tire pressure: if this screen shows the new values, the light will turn off; otherwise, you will need to drive for a few miles so that the sensors can read the new values and turn off the light afterward. by ScegliAuto More videos
|
|
For advertising on this site Write to info@scegliauto.com
ScegliAuto is not responsible for any inaccuracy of the data in the lists. To report any inaccuracy or your business (if you own the business in question), please write to info@scegliauto.com
Number of seconds to generate the page: 0.099
(c) ScegliAuto 2026 - info@scegliauto.com - Privacy policy VAT number: IT01247470535 |
