
|
Do it yourself
| |||
| ||||


Replacing Petrol Engine Spark Plugs
Model: Volvo S70
MK 1
- Years 1996-2000
Disconnect the negative terminal of the battery. Remove the first spark plug cap. At the bottom of the well is the spark plug. Before proceeding with removal, clean the housing thoroughly with compressed air. Using a 16mm spark plug socket, gently insert it onto the spark plug head and unscrew it. Be careful not to drop any foreign objects into the well. Replace the spark plug with one of the same model, carefully inserting it into the well and gently turning it to ensure it screws in correctly. If you feel resistance, remove it and try again. Spark plugs should be tightened with a torque wrench; if you do not have one, tighten without overdoing it. Repeat the same procedure for the other spark plugs.
Updated on 5 February 2026 by ScegliAuto
Video tutorial
Related tutorials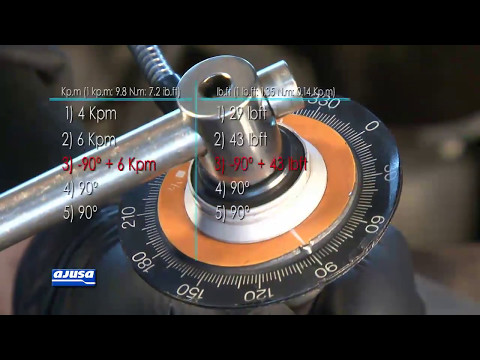
Volvo S70
(1996-2000 /
MK 1)
The heart of the engine is the car gasket that encloses the movement of the pistons, preventing oil from coming into contact with water. These gasket…
Volvo S70
(1996-2000 /
MK 1)
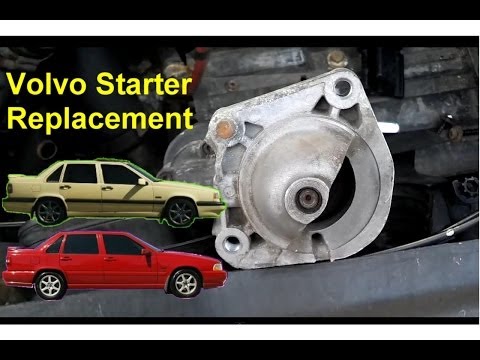
This video demonstrates how to replace the starter motor on a Volvo 850. The same procedure applies to other Volvo models such as S70, V70, and XC70.…
Volvo S70
(1996-2000 /
MK 1)
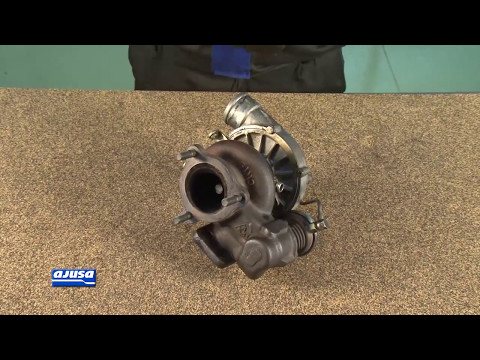
Installing turbochargers is not a simple task, and it requires first carrying out necessary operations such as: replacing the oil lines, as often cle…
Other guides you may be interested in
|
How to Remove the Window Regulator Motor from a Volkswagen Touareg
Learn how to remove the door motor from a Volkswagen Touareg. Before starting the disassembly, disconnect the battery terminals located in the engine bay. Use a lever or screwdriver to remove the handle cover, then unscrew the screws inside with the screwdriver. Unscrew the remaining screws on the door panel and detach the retaining clips. Remove the door panel by hand, then use a screwdriver or power screwdriver to unscrew the fastening screws of the door actuator motor. Disconnect the various power terminals and replace it with a new one. Reassemble everything in reverse order. by ScegliAuto More videos
|
|
For advertising on this site Write to info@scegliauto.com
ScegliAuto is not responsible for any inaccuracy of the data in the lists. To report any inaccuracy or your business (if you own the business in question), please write to info@scegliauto.com
Number of seconds to generate the page: 0.091
(c) ScegliAuto 2026 - info@scegliauto.com - Privacy policy VAT number: IT01247470535 |