
|
Do it yourself
| |||
| ||||


Replacing the Brake Pads
Model: Fiat Stilo
MK 1
- Years 2001-2010
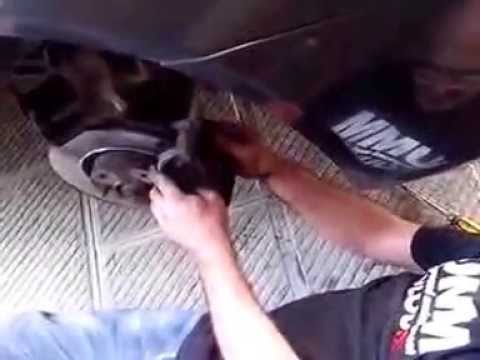
First, remove the front wheel and turn the steering to gain easy access to the work area. Put on a good pair of gloves and remove the two pins holding the brake caliper using a 13mm spanner. Then, disconnect the brake warning cable, which is attached to the outer pad, and remove the caliper.
Next, you need to retract the piston that presses on the pads to allow for the insertion of the new pads. Finally, insert the new pads and reassemble everything, remembering to reconnect the brake warning cable. You can also take this opportunity to bleed the brake fluid from the line by opening the appropriate valve to ensure no air bubbles remain.
Updated on 1 February 2026 by ScegliAuto
This video is currently unavailable
Related tutorials
Fiat Stilo
(2001-2010 /
MK 1)
Replacing the front brake pads is a maintenance task that can easily be done yourself: once the vehicle is raised and secured on appropriate axle sta…
Fiat Stilo
(2001-2010 /
MK 1)
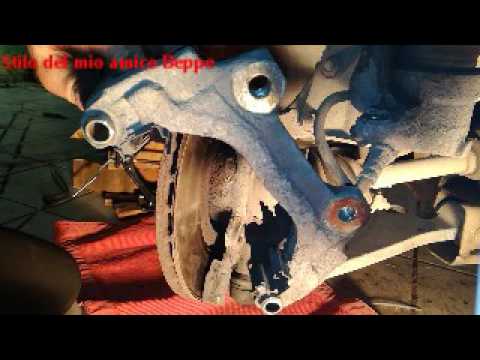
Let's see how to remove the front brake disc on a Fiat Stilo. Position the car on a column lift and raise it to a comfortable height for work. Unscre…
Fiat Stilo
(2001-2010 /
MK 1)
How to remove the front brake disc of a Fiat Stilo. Position your car on a column lift (jack), raising it to a comfortable height for working. Unscre…
Other guides you may be interested in
|
Removing the Front Arm Bushing of a Hyundai Getz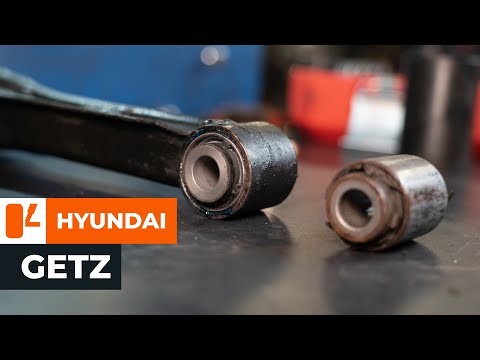
Let's look at removing the front arm bushing of a Hyundai Getz. First, place the car on a column lift and loosen the wheel nuts with a telescopic spanner, then remove the wheel. Use a socket spanner to unscrew the lower securing bolt of the arm and the bolt mounted under the wheel hub, then unscrew the bolts on the upper part of the arm (as shown in the video). Remove the bushing from the bolt housing. Always compare the parts to be replaced with the new ones; if they are suitable, you can install them. Start the installation of the new part: fit the new bushing and tighten all bolts to the specified torque. Double-check the correct tightening of the parts. Refit the wheel to complete the job. by ScegliAuto More videos
|
|
For advertising on this site Write to info@scegliauto.com
ScegliAuto is not responsible for any inaccuracy of the data in the lists. To report any inaccuracy or your business (if you own the business in question), please write to info@scegliauto.com
Number of seconds to generate the page: 0.063
(c) ScegliAuto 2026 - info@scegliauto.com - Privacy policy VAT number: IT01247470535 |