
|
Do it yourself
| |||
| ||||


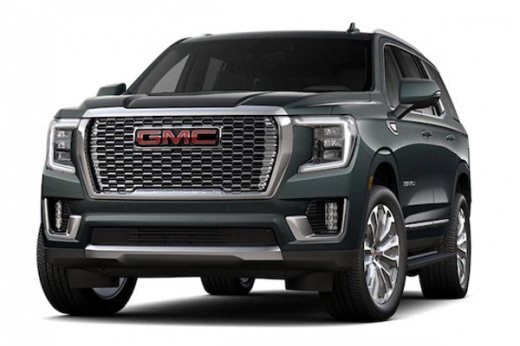
How to replace the thermostat of the Yukon Denali
Model: GMC Yukon
Gmt1yc
- Years:
2021, 2022, 2023, 2024, 2025, 2026
Video tutorial
Today we will independently replace the thermostat of the Yukon Denali. We disconnect the battery using a deep 10 mm socket to disconnect the negative ground cable. We disconnect the PCV system by pushing up the inner part to separate it from the air silencer; we remove the mass airflow tube and the air filter box, using a flathead screwdriver to remove the clamp and unclip the clips. We disconnect the radiator clamp and unscrew the locking screws to remove the coolant hose, letting the liquid drain into a container before proceeding with the removal. Using pliers, we remove the clamps on the second coolant hose connected to the thermostat. We unscrew the three bolts and remove the thermostat. The replacement process continues with the insertion of a new thermostat, which will be screwed into its seat, followed by inserting the coolant hose into it. We connect the connector and insert the radiator, securing it with screws and connecting the second coolant hose. We assemble the air tube and the air filter box. We tighten the tensioner and connect the PCV connector and the battery. We pour the coolant into the radiator.
Posted on 21 January 2026 by ScegliAuto
Related tutorials
GMC Yukon
(2021-2026 /
Gmt1yc)
Before resetting the engine oil life, perform maintenance on the vehicle, such as changing the engine oil and filters. After completing the DIY servi…

GMC Yukon
(2000-2006 /
Gmt800)
To replace the headlight bulb on a GMC Yukon, open the hood to access the components in the upper part of the engine compartment. You will find the s…

GMC Yukon
(2021-2026 /
Gmt1yc)
Are you tired of hearing the seat belt alarm every time you start your 2022 GMC Yukon? This tutorial will show you how to disable it. Start by turnin…
Other guides you may be interested in
|
How to Remove the Rear Seat of a Hyundai Tucson?
To remove the rear seat of a Hyundai Tucson, follow these steps. Start by moving the front seats to their most forward position to gain space. Next, locate the release lever on the underside of the rear seat, near the floor. Press this lever down while pulling the seat upwards to unlock it from the anchor pins. Once unlocked, tilt the seat upwards and forwards to remove it from its position. Repeat this process for both sides of the rear seat. Be careful of any electrical cables or components that may be connected to the seat during removal. Once the rear seat is removed, the disassembly is complete. by ScegliAuto More videos
|
|
For advertising on this site Write to info@scegliauto.com
ScegliAuto is not responsible for any inaccuracy of the data in the lists. To report any inaccuracy or your business (if you own the business in question), please write to info@scegliauto.com
Number of seconds to generate the page: 0.079
(c) ScegliAuto 2026 - info@scegliauto.com - Privacy policy VAT number: IT01247470535 |
