
|
Do it yourself
| |||
| ||||


Replacement of Rear Brake Discs
Model: Hyundai Santa Fe
MK 1
- Years:
2000, 2001, 2002, 2003, 2004, 2005, 2006
Video tutorial
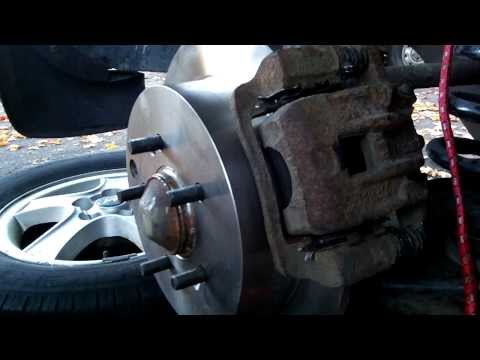
Dirt infiltration between the pads and discs can irreparably damage them, so they need to be replaced. Start by removing the brake caliper using a ratchet spanner to unscrew the two rear screws. Remove the caliper support in the same way. Using a star screwdriver, unscrew the two retaining screws of the disc while holding it steady. If the disc is stuck, use a rubber mallet to tap it until it fully comes off the hub. Clean the support thoroughly from any debris using a deoxidising spray. Clean the new discs before installation to remove the protective grease. Apply copper grease around the disc support to prevent seizing due to oxidation or rust. Refit the disc, aligning the fixing holes. For securing the bracket and caliper, use new screws if possible; otherwise, clean and lubricate the old ones. Use a wire brush to remove most of the accumulated dirt. Reposition the piston to its starting position and fit the new pads. Refit the caliper and the wheel.
Updated on 7 February 2026 by ScegliAuto
Related tutorials
Hyundai Santa Fe
(2000-2006 /
MK 1)
Dirt infiltration between the pads and discs can irreparably damage them, so replacement is necessary. Remove the brake caliper using a ratchet spann…
Hyundai Santa Fe
(2000-2006 /
MK 1)
Lift the vehicle on suitable car stands and remove the wheel. Then unscrew the fixing screws of the disc to the hub and, before removing it, dismantl…

Hyundai Santa Fe
(2000-2006 /
MK 1)
Lift the vehicle on a hydraulic lift and remove the rear wheel; then remove the retaining pins of the brake caliper and take it off the bracket; extr…
Other guides you may be interested in
|
How to Remove the Rear Seat of a Hyundai Tucson?
To remove the rear seat of a Hyundai Tucson, follow these steps. Start by moving the front seats to their most forward position to gain space. Next, locate the release lever on the underside of the rear seat, near the floor. Press this lever down while pulling the seat upwards to unlock it from the anchor pins. Once unlocked, tilt the seat upwards and forwards to remove it from its position. Repeat this process for both sides of the rear seat. Be careful of any electrical cables or components that may be connected to the seat during removal. Once the rear seat is removed, the disassembly is complete. by ScegliAuto More videos
|
|
For advertising on this site Write to info@scegliauto.com
ScegliAuto is not responsible for any inaccuracy of the data in the lists. To report any inaccuracy or your business (if you own the business in question), please write to info@scegliauto.com
Number of seconds to generate the page: 0.018
(c) ScegliAuto 2026 - info@scegliauto.com - Privacy policy VAT number: IT01247470535 |
