
|
Do it yourself
| |||
| ||||


Maruti Ertiga Years 2012-2018 (MK 1) Maruti Ertiga (2012-2018 / MK 1)
How do you set the clock on a Suzuki/Maruti Ertiga? In this video we see how to set the clock on a Suzuki or Maruti Ertiga (it is the same model produced by two affiliated brands) on the instrument panel we find …read all… Posted on 14 April 2024 by ScegliAuto  Maruti Ertiga (2012-2018 / MK 1)
How do you reset the airbag light on the Maruti Ertiga? In order to reset the airbag light of the Maruti Ertiga, you need to check for any damages to the appropriate fuses or cables connected to various sensors. If …read all… Posted on 1 December 2023 by ScegliAuto 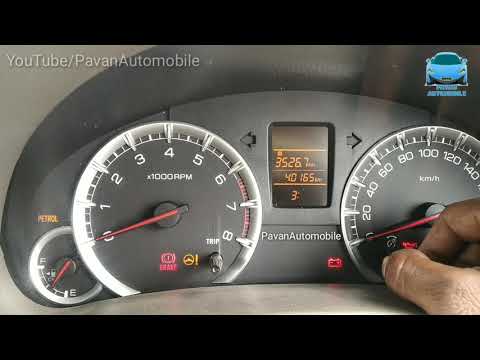 Maruti Ertiga (2012-2018 / MK 1)
How to set the time on a Maruti Ertiga vehicle? Setting the clock on a Maruti Ertiga vehicle is a very simple operation, achievable in a few minutes. The first thing to do is to get inside the car and turn …read all… Posted on 17 November 2023 by ScegliAuto 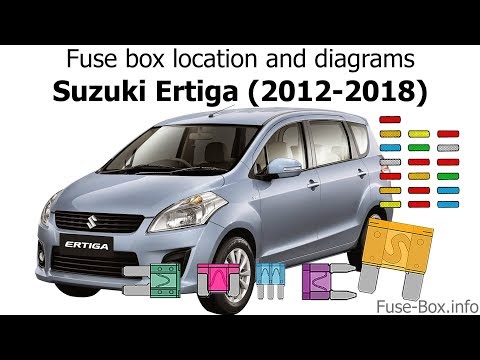 Maruti Ertiga (2012-2018 / MK 1)
Where is the cabin light fuse located in the Suzuki Ertiga? In case the interior light of our Suzuki Ertiga suddenly stops working, the first thing we can do is check the condition of the respective fuse, whose location …read all… Posted on 3 November 2023 by ScegliAuto 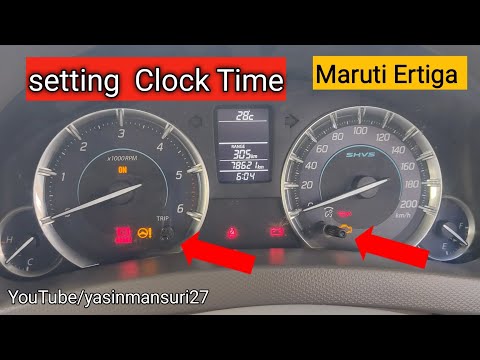 Maruti Ertiga (2012-2018 / MK 1)
How to manually set the time on the Maruti Ertiga? If the clock on the instrument panel of your Maruti Ertiga first generation (year 2012-2018) is displaying the wrong time and you want to manually adjust it, …read all… Posted on 17 October 2023 by ScegliAuto 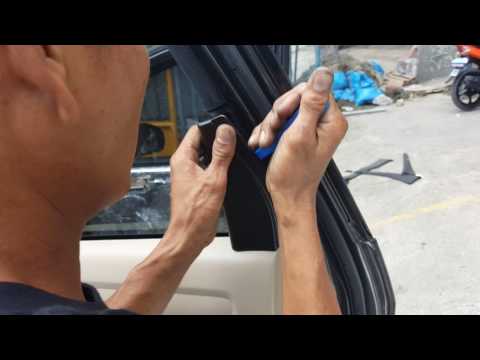 Maruti Ertiga (2012-2018 / MK 1)
How to remove the rear door panel of Maruti Ertiga Mk1. The guide shows how to disassemble the rear door panel of the Maruti Ertiga Mk1. The first step is to open the small cover in the door handle compartment and …read all… Posted on 9 June 2023 by ScegliAuto 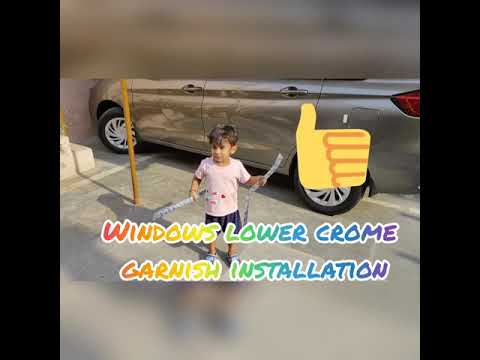 Maruti Ertiga (2012-2018 / MK 1)
How to install a chrome seal on the window of the Maruti Ertiga? The first step to install chrome trims on the windows of the Maruti Ertiga is to thoroughly clean the area where we will be working to remove any traces of …read all… Posted on 2 April 2023 by ScegliAuto 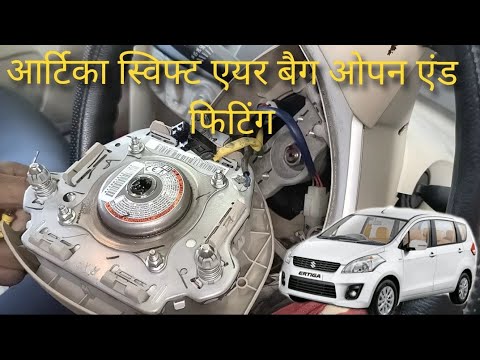 Maruti Ertiga (2012-2018 / MK 1)
How to replace the steering wheel airbag on your Maruti Ertiga In this short and simple guide, let's see the instructions on how to disassemble and replace the Maruti Ertiga steering wheel airbag. First, let's get on board …read all… Posted on 26 May 2023 by ScegliAuto 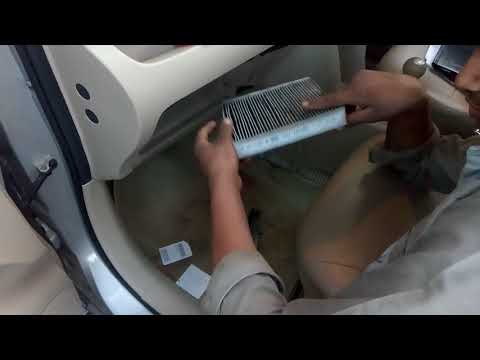 Maruti Ertiga (2012-2018 / MK 1)
How to replace the cabin air filter on Maruti Ertiga If we have noticed that when we go to turn on the climate control system on our car the air flow is considerably reduced, it is probably necessary to replace …read all… Posted on 12 April 2023 by ScegliAuto 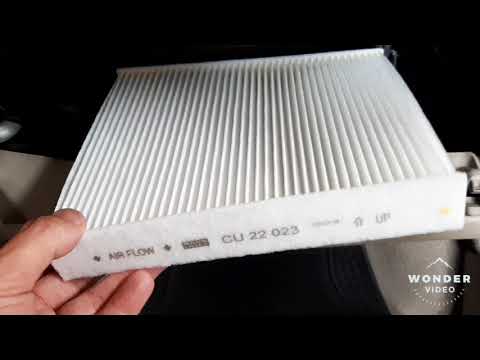 Maruti Ertiga (2012-2018 / MK 1)
How to replace the pollen filter in a Maruti Ertiga. In this video tutorial we can see how it is possible to replace the pollen filter in a Maruti Ertiga, following some simple steps: the first thing to do is to …read all… Posted on 7 September 2022 by ScegliAuto 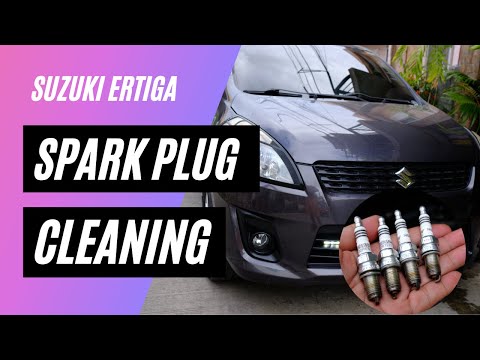 Maruti Ertiga (2012-2018 / MK 1)
How do you replace the Maruti Ertiga candles? To be able to replace the spark plugs of the Maruti Ertiga you have to go and open the hood, so that you have access to the components inside the engine …read all… Posted on 5 June 2022 by ScegliAuto 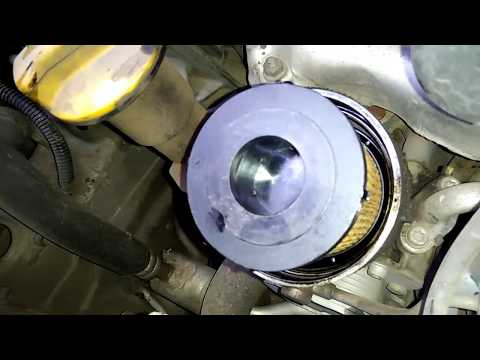 Maruti Ertiga (2012-2018 / MK 1)
Maruti Ertiga engine oil and oil filter replacement Let's find out the instructions on how to carry out the routine maintenance coupon, replacing the engine oil and the oil filter, by Maruti Ertiga. First of all …read all… Posted on 26 April 2024 by ScegliAuto |
See also:
Handbrake adjustment on Ford Ecosport
First remove the plastic profile at the base of the gear lever. To do this, slightly widen the side edges and carefully lift it to release it. There is no need to remove it completely, just move it forward to avoid bother. Now remove the plastic center console around the handbrake by first working from the rear to release it and lifting it until the brake lever passes. Also in this case it is not necessary to remove it completely but, paying attention to the connected cables, it can be stowed in front of the passenger seat. At this point we notice that at the base of the handbrake lever, on the front, we find a nut. By acting on it, with a 10 wrench, we can adjust the brake force, increasing it by turning the nut clockwise, or decreasing it by turning it counterclockwise. Once adjusted, the center console can be repositioned first, pressing lightly to engage it, and then the profile of the gearbox base. by ScegliAuto More videos
|
|
For advertising on this site Write to info@scegliauto.com
ScegliAuto is not responsible for any inaccuracy of the data in the lists. To report any inaccuracy or your business (if you own the business in question), please write to info@scegliauto.com
Number of seconds to generate the page: 0.010
(c) ScegliAuto 2024 - info@scegliauto.com - Privacy Policy VAT number: IT01247470535 |