
|
Do it yourself
| |||
| ||||


Maruti Dzire - Video tutorial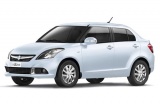
Model: Maruti Dzire
MK 2
- Years 2012-2017 The first thing to do is to get the kit, which consists of a LED strip with plugs: they can be found almost anywhere on e-commerce platforms, and for a few tens of euros you can choose the type you want - the choice is really wide. Start by dismantling the driver's side interior of the Maruti Dzire door, which is held up by only two screws. Pay attention to the electric window control. We will also have to remove the switch panel, because we will run the wire through there. Measure the LED - which is pressure-sensitive, so we will have to cut it to size - cut a part of the lining to pass it under the handle, then attach it in its visible part by passing it between the two parts of the lining. Put the switch panel back, running the wires to the control box which should be near the driver's seat. Place the box next to the clutch, under the mat and the wires must be inside the dashboard so that they are not visible. Make sure the edge of the fiber is cut flat, so that it touches the bulb for optimal brightness. Connect the LED to the end of a cable, securing it with a screw. Do this also for the passenger door and the rear doors, which will also be connected to the cables leading to the front dashboard. Of course, you can choose whether to follow the YouTuber's instructions and do a complete decoration or choose something more subtle.
Posted on 14 May 2023 by ScegliAuto
Other guides that may interest you
|
Handbrake adjustment on Ford Ecosport
First remove the plastic profile at the base of the gear lever. To do this, slightly widen the side edges and carefully lift it to release it. There is no need to remove it completely, just move it forward to avoid bother. Now remove the plastic center console around the handbrake by first working from the rear to release it and lifting it until the brake lever passes. Also in this case it is not necessary to remove it completely but, paying attention to the connected cables, it can be stowed in front of the passenger seat. At this point we notice that at the base of the handbrake lever, on the front, we find a nut. By acting on it, with a 10 wrench, we can adjust the brake force, increasing it by turning the nut clockwise, or decreasing it by turning it counterclockwise. Once adjusted, the center console can be repositioned first, pressing lightly to engage it, and then the profile of the gearbox base. by ScegliAuto More videos
|
|
For advertising on this site Write to info@scegliauto.com
ScegliAuto is not responsible for any inaccuracy of the data in the lists. To report any inaccuracy or your business (if you own the business in question), please write to info@scegliauto.com
Number of seconds to generate the page: 0.028
(c) ScegliAuto 2024 - info@scegliauto.com - Privacy Policy VAT number: IT01247470535 |