
|
Do it yourself
| |||
| ||||


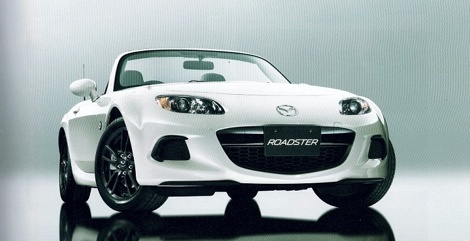
Replacement of Front Speakers
Model: Mazda Mx 5
NC, MK 3
- Years:
2005, 2006, 2007, 2008, 2009, 2010, 2011, 2012, 2013, 2014, 2015
Video tutorial
Lower the door window and remove the screw located in the handle opening area. Unscrew the various screws located on the sides. Use a plastic tool to pry between the bodywork and the door trim until it lifts. Gently lift the plastic trim from the bottom, disengaging all clips using the plastic tool. Use your fingers to also disengage the clips at the top until the entire assembly is removed, taking care with the speaker wires. Disconnect the connector from the control unit and unscrew all screws securing the speaker assembly. Remove the four screws holding the original speaker located under the seal. Take out the speaker and the connected wires. Insulate the connectors with a wrap of insulating tape and gently tighten them with pliers. Connect the connectors to the new speaker and secure it in place using the four screws. Remove the protective paper from the new seal and position it around the speaker. Refit the speaker assembly into the door and reconnect the connector. Remove the door pillar trim and replace the tweeter with the new one.
Updated on 8 February 2026 by ScegliAuto
Related tutorials
Mazda Mx 5
(1989-1997 /
MK 1)
Due to aging and weather conditions, headlamps tend to yellow and need to be replaced. To replace the front headlamp, open the bonnet and position th…

Mazda Mx 5
(1998-2005 /
NB, MK 2)
Lift the vehicle with a jack and apply axle stands to securely support it during the repair. Remove the front wheel (loosen the bolts before lifting)…

Mazda Mx 5
(1998-2005 /
NB, MK 2)
Open the front bonnet, unscrew the oil filler cap, and pull out the dipstick (this will aid in draining the used oil).
Lift the vehicle on suitable c…
Other guides you may be interested in
|
How to Reset the Tyre Pressure Warning Light on the Jeep Renegade?
To reset the tyre pressure warning light on the Jeep Renegade, inflate the tyres until they reach the recommended pressure: this value is indicated on the sticker attached to the driver’s door pillar. Once the tyres are properly inflated, navigate through the menu that appears on the instrument cluster until you find the tyre pressure option. At this point, press and hold the OK button on the right side of the steering wheel to make the warning light disappear. by ScegliAuto More videos
|
|
For advertising on this site Write to info@scegliauto.com
ScegliAuto is not responsible for any inaccuracy of the data in the lists. To report any inaccuracy or your business (if you own the business in question), please write to info@scegliauto.com
Number of seconds to generate the page: 0.043
(c) ScegliAuto 2026 - info@scegliauto.com - Privacy policy VAT number: IT01247470535 |
