
|
Do it yourself
| |||
| ||||


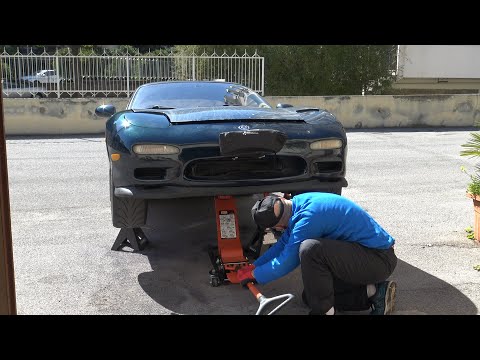
How to Replace the Starter Motor on a Mazda RX 7?
Model: Mazda Rx 7
MK 3, FD
- Years 1991-2002
First, lift the car using appropriate jack stands as the starter motor is located underneath, near the clutch. Then, remove the cover, remembering to disconnect the negative terminal of the battery first to avoid short circuits. Now, disconnect the starter motor, starting with the solenoid connector. After disconnecting the cables, remove the bolts that secure the starter motor in place. Once done, remove the old starter motor and place the new one in position, refitting the bolts and then the electrical component. Finally, reconnect the negative terminal of the battery. A useful tip to prevent oxidation of the parts is to apply silicone grease to the various connections (before reconnecting the cables).
Updated on 16 May 2026 by ScegliAuto
Video tutorial
Related tutorials
Mazda Rx 7
(1991-2002 /
MK 3, FD)
In this video, we will see how to behave when our Mazda RX-7 turns on but does not start. Can we exclude a battery problem? Not completely, because t…

Mazda Rx 7
(1991-2002 /
MK 3, FD)
The main instructions provided in this guide will show us how to disassemble and replace the spark plugs of the Mazda RX-7 engine. First, we open the…
Mazda Rx 7
(1991-2002 /
MK 3, FD)
Today, you will learn how to replace the engine oil and oil filter on your Mazda RX7. This is not a very complex task; just take some care, and you c…
Other guides you may be interested in
|
How to Bleed the Clutch on a Renault Clio?
To bleed the clutch on a Renault Clio, open the bonnet to access the components located in the engine bay: here, you will need to undo the screws that secure the battery in its housing, the intake manifold, and the coolant reservoir. This will allow you to locate the pipe through which the brake fluid flows: by inserting the other end of the pipe into a container, you can press the clutch pedal to expel all the fluid until it fills the container. by ScegliAuto More videos
|
|
For advertising on this site Write to info@scegliauto.com
ScegliAuto is not responsible for any inaccuracy of the data in the lists. To report any inaccuracy or your business (if you own the business in question), please write to info@scegliauto.com
Number of seconds to generate the page: 0.428
(c) ScegliAuto 2026 - info@scegliauto.com - Privacy policy VAT number: IT01247470535 |
