
|
Do it yourself
| |||
| ||||


The Consequences of a Timing Chain Failure in a Mini Countryman
Model: Mini Mini
Countryman1, R60
- Years 2010-2016
In this video, you will see the consequences of a timing chain failure in a Mini Countryman with an N47 engine. The damage was significant, and to carry out the repair, it was necessary to dismantle the entire vehicle: engine, gearbox, differential, and transmission. In this engine, the timing mechanism consists of three chains: the oil pump chain was undamaged, while the other two have broken. There was no damage to the connecting rods, but the cylinder head and valves suffered the most damage. In the camshaft housing, only the pulley will need to be replaced, while we see the basket with the damaged components: gasket, bolts, guides, tappets, rockers, and the high-pressure pulley that have exploded. The sump is now clean of debris, and naturally, the head is new along with the seats and intake and exhaust valves. In this case, the break was sudden, but often it gives warnings by rubbing against the cover. Good maintenance can prevent these issues; manufacturers indicate maintenance intervals that are too long: especially for diesels, 18,600 miles is too much due to missed DPF regenerations. The recommendation is to halve these intervals.
Updated on 14 September 2026 by ScegliAuto
Video tutorial
Related tutorials
Mini
(2010-2016 /
Countryman1, R60)
The procedure for replacing the timing chain on the Mini Countryman involves opening the bonnet to access the engine compartment and removing the pla…

Mini
(2010-2016 /
Countryman1, R60)
To replace the timing chain on a Mini Countryman, open the bonnet to access the components in the engine bay. On the left side of the engine block, l…
Mini
(2010-2016 /
Countryman1, R60)
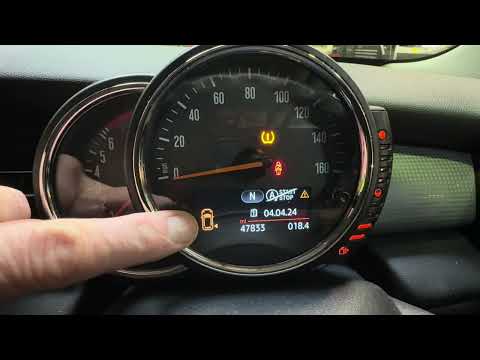
If the orange tire pressure warning light on the instrument panel of your 2015 Mini Countryman continues to stay on, it means that the control unit h…
Other guides you may be interested in
|
How to Replace the Remote Battery for the Volvo XC40?
In this tutorial, you will see how to replace the battery in the remote for the Volvo XC40, a very simple and quick operation. For this, you will need a replacement battery of type CR2032 and possibly a small flathead screwdriver. First, remove the front cover by pressing the button on the metal ring, then locate the second button, press it as well, and remove the opposite cover. Next, open the circular cap, take out the old battery, and insert the new one in the opposite direction. Finally, reassemble everything. by ScegliAuto More videos
|

|
For advertising on this site Write to info@scegliauto.com
ScegliAuto is not responsible for any inaccuracy of the data in the lists. To report any inaccuracy or your business (if you own the business in question), please write to info@scegliauto.com
Number of seconds to generate the page: 0.149
(c) ScegliAuto 2026 - info@scegliauto.com - Privacy policy VAT number: IT01247470535 |
