
|
Do it yourself
| |||
| ||||


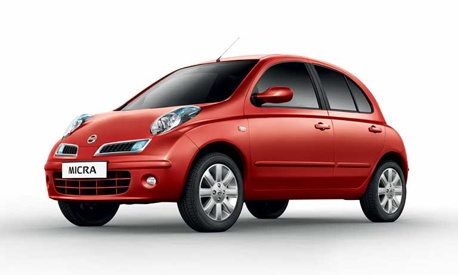
Problems caused to a Nissan Micra K12 by a worn timing chain
Model: Nissan Micra
K12
- Years:
2002, 2003, 2004, 2005, 2006, 2007, 2008, 2009, 2010
Video tutorial
In this video, we can see the damage caused by a worn timing chain in a Nissan Micra K12: first of all, there is abnormal wear on the wiring points because the chain has worn out the sprockets and tensioners, leading to a timing slip; it then caused damage to the pistons and valves, irreparably damaging the engine. It was necessary to remove the entire engine block, dismantle the oil and water pump (both driven by the chain), the latter has a VVT system that requires special attention. If even a single tooth of the chain jumps, the engine will suffer serious damage. Along with the chain, we must also replace the sprockets and tensioners. It is advisable to check for abnormal noises early, such as ticking when cold, and to use only original parts. This is a job that requires experience and specific equipment.
Posted on 7 September 2025 by ScegliAuto
Related tutorials
Nissan Micra
(2002-2010 /
K12)
In this guide, we will see the main instructions on how to disassemble and replace the timing chain of the Nissan Micra. In order to access the timin…

Nissan Micra
(2002-2010 /
K12)
The 1.0 petrol engine of the Nissan Micra K12 has a timing chain, which may stretch and become noisy; replacing the chain requires some skill, especi…

Nissan Micra
(2002-2010 /
K12)
Today, review the key information needed to dismantle the timing chain on the Nissan Micra 1.2, following the instructions below. First, open the bon…
Other guides you may be interested in
|
How to Remove the Rear Seat of a Hyundai Tucson?
To remove the rear seat of a Hyundai Tucson, follow these steps. Start by moving the front seats to their most forward position to gain space. Next, locate the release lever on the underside of the rear seat, near the floor. Press this lever down while pulling the seat upwards to unlock it from the anchor pins. Once unlocked, tilt the seat upwards and forwards to remove it from its position. Repeat this process for both sides of the rear seat. Be careful of any electrical cables or components that may be connected to the seat during removal. Once the rear seat is removed, the disassembly is complete. by ScegliAuto More videos
|
|
For advertising on this site Write to info@scegliauto.com
ScegliAuto is not responsible for any inaccuracy of the data in the lists. To report any inaccuracy or your business (if you own the business in question), please write to info@scegliauto.com
Number of seconds to generate the page: 0.030
(c) ScegliAuto 2026 - info@scegliauto.com - Privacy policy VAT number: IT01247470535 |
