
|
Do it yourself
| |||
| ||||


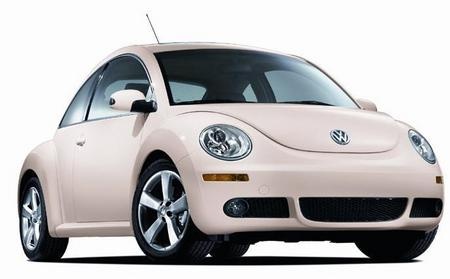
Repairing Front Door Lock
Model: Volkswagen New Beetle
9C, MK 2
- Years:
1999, 2000, 2001, 2002, 2003, 2004, 2005, 2006, 2007, 2008, 2009, 2010
Video tutorial
Before proceeding with the repair, obtain the new lock cylinder. Using a Torx key, remove the retaining screws located at the bottom of the door panel. Remove the handle trim to access the screws that also need to be removed. Gently push the panel upwards to unclip it and remove it, taking care to disconnect the electrical wiring. Remove the screws from the aluminium backing panel, which must be taken off to access the lock. Unscrew the screws on the side of the door to remove the lock assembly. The lock will need to be pulled out of its housing after disconnecting the electrical cables. Place it on a flat surface to proceed with the replacement of the lock cylinder. Remove the cover to access the inside. The replacement process is quite delicate as the interior incorporates a sensitive mechanism, so it is recommended for experienced individuals. Using a soldering iron for electronic components, solder wire, and a copper sleeve, desolder the circuit board and replace the lock cylinder.
Updated on 2 February 2026 by ScegliAuto
Related tutorials
Volkswagen New Beetle
(1999-2012 /
9C, MK 2)
Remove the three fixing screws located along the bottom edge of the panel; unclip the cover of the internal handle and unscrew the underlying screws;…

Volkswagen New Beetle
(1999-2012 /
9C, MK 2)
In this guide, we will explore the instructions that will allow us to repair the window regulator motor on the Volkswagen New Beetle. First, get into…

Volkswagen New Beetle
(1999-2012 /
9C, MK 2)
Remove the right front door panel on the Volkswagen New Beetle: disconnect the battery terminals located in the engine compartment. Using a screwdriv…
Other guides you may be interested in
|
How to Reset the Tire Pressure Light on a MG ZS?
On the instrument cluster of the MG ZS, the tire pressure light that appears can be reset by inflating the tires to the correct pressure: this value will be indicated on the sticker attached to the driver's door pillar. Once the tires have been properly inflated, you can turn on the instrument cluster and navigate through the menu until you find the option that indicates tire pressure: if this screen shows the new values, the light will turn off; otherwise, you will need to drive for a few miles so that the sensors can read the new values and turn off the light afterward. by ScegliAuto More videos
|
|
For advertising on this site Write to info@scegliauto.com
ScegliAuto is not responsible for any inaccuracy of the data in the lists. To report any inaccuracy or your business (if you own the business in question), please write to info@scegliauto.com
Number of seconds to generate the page: 0.103
(c) ScegliAuto 2026 - info@scegliauto.com - Privacy policy VAT number: IT01247470535 |
