
|
Do it yourself
| |||
| ||||


Proper Maintenance of a Timing Belt on a Volkswagen Golf IV
Model: Volkswagen Golf
Golf IV, MK 4, Golf 4
- Years 1997-2003
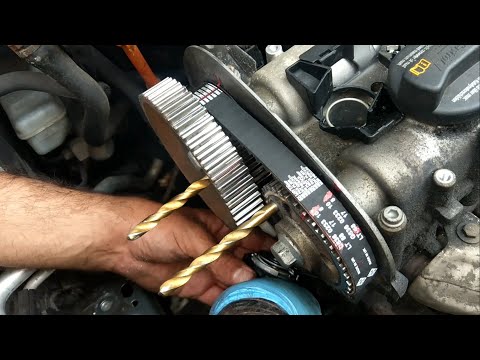
In this video, we see how important it is to maintain the timing belt of a vehicle like the Volkswagen Golf IV, based on both time intervals and mileage. The vehicle in question, which is now about 20 years old, had its first timing belt change at 100,000 miles: it now had only 170,000 miles, but the time interval had been reached. The owner decided to change the belt anyway, and from the examination of the parts, we see that he made the right choice, as both belts were heavily worn, the water pump showed clear signs of rust, and the bearings, although not yet damaged, were already making noise. In short, we intervened before something truly serious could happen, simply by respecting the time interval, following the good rule: "10 years or 100,000 miles, whichever comes first."
Updated on 24 September 2026 by ScegliAuto
Video tutorial
Related tutorials
Volkswagen Golf
(2012-2019 /
Golf VII, MK 7, Golf 7)
Below we will discover information on how to disassemble and replace the timing belt of the Volkswagen Golf 1.6 TDI; the manufacturer states that, on…

Volkswagen Golf
(2012-2019 /
Golf VII, MK 7, Golf 7)
Today's main information will show you how and when to replace the timing belt on a Volkswagen Golf 1.4 TSI. For this type of engine, the timing belt…
Volkswagen Golf
(2003-2008 /
MK 5, Golf 5, Golf V)
Here are the instructions on how to remove and replace the timing belt on a Volkswagen Golf 1.4 petrol, following these simple steps. First, lift the…
Other guides you may be interested in
|
Fuses Location and Diagram for the Volkswagen Crafter
In this guide, we will look at the location of the fuse boxes and how to find their diagram for the Volkswagen Crafter. First, get inside the vehicle and start by removing the plastic cover found under the steering wheel, to access the internal fuse box; you will find another fuse box in the engine compartment by removing the plastic cover located next to the battery. At this point, use the owner's manual to find the fuse diagram, which will allow you to identify and replace any blown fuses with new ones! by ScegliAuto More videos
|
|
For advertising on this site Write to info@scegliauto.com
ScegliAuto is not responsible for any inaccuracy of the data in the lists. To report any inaccuracy or your business (if you own the business in question), please write to info@scegliauto.com
Number of seconds to generate the page: 0.206
(c) ScegliAuto 2026 - info@scegliauto.com - Privacy policy VAT number: IT01247470535 |
