
|
Do it yourself
| |||
| ||||


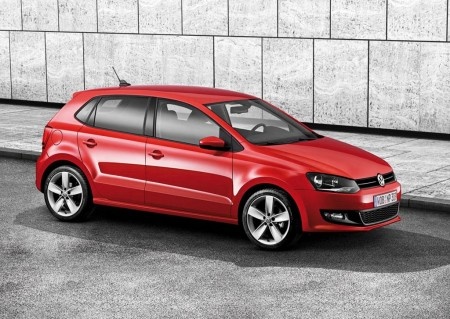
How to Replace the Fog Light Bulbs on the Volkswagen Polo MK5
Model: Volkswagen Polo
6R, MK V, Polo 5, Polo V, MK 5
- Years:
2009, 2010, 2011, 2012, 2013, 2014, 2015, 2016, 2017
Video tutorial
In this video, we can see how to change the bulbs in the fog lights of a Volkswagen Polo MK5: first, we need to remove the outer trim of the headlight, which is held to the body by two bolts, now clearly visible. Remove them and disconnect the fog light's electrical plug to completely take the headlight out of its housing. However, by doing this, we will have left the bulb in place, and to change it, we will need to go under the vehicle, remove the two screws holding the inner cover in place. This way, we can reach inside the fog light and find the connector that holds the bulb. Simply remove the old one and insert the new one. Then, put everything back together from the outside.
Updated on 16 October 2026 by ScegliAuto
Related tutorials
Volkswagen Polo
(2009-2017 /
6R, MK V, Polo 5, Polo V, MK 5)
This guide shows how to replace the interior lights of a Volkswagen Polo Mk5 with new LED bulbs. For the front bulbs, simply detach the rear cover an…

Volkswagen Polo
(2009-2017 /
6R, MK V, Polo 5, Polo V, MK 5)
This guide shows how to replace the number plate light bulbs on the Volkswagen Polo Mk5. The operation is very simple and does not require special to…

Volkswagen Polo
(2009-2017 /
6R, MK V, Polo 5, Polo V, MK 5)
Fuses within a vehicle have a very important role, which is to manage the electronic parts and prevent short circuits in case of malfunction of that …
Other guides you may be interested in
|
Where to Find and How to Remove the Spare Wheel of a Peugeot 5008?
The spare wheel of a Peugeot 5008 is located under the rear of the vehicle. To remove it, you need to lift the third row of seats to access the fixing bolt that holds the spare wheel in position. Using the correct spanner, proceed to unscrew the fixing bolt until the wheel is no longer secured. At this point, you can extract the spare wheel from underneath the vehicle. Once you have completed this step, you are free to fit the spare wheel. Ensure you correctly remount the spare wheel and securely tighten the fixing bolt when you are finished. by ScegliAuto More videos
|
|
For advertising on this site Write to info@scegliauto.com
ScegliAuto is not responsible for any inaccuracy of the data in the lists. To report any inaccuracy or your business (if you own the business in question), please write to info@scegliauto.com
Number of seconds to generate the page: 0.054
(c) ScegliAuto 2026 - info@scegliauto.com - Privacy policy VAT number: IT01247470535 |
