
|
Do it yourself
| |||
| ||||


How to Replace the Dashboard Bulbs of the Ford Ranger
Model: Ford Ford Various
This guide shows how to replace the dashboard bulbs of the Ford Ranger. The first operation to perform is to undo the three 7 mm screws located at the top of the dashboard compartment; undo the two 7 mm screws located under the radio. Using a trim tool, pry the lower part of the central console trim to detach it. Disconnect all the electrical connections located behind the removed panel. Remove the 7 mm screw on the left side of the opened compartment. Remove the plastic panel under the dashboard by undoing the four 7 mm screws. Undo the screws securing the metal partition and undo the remaining 7 mm screws that are exposed. Lower the steering wheel completely and, if the vehicle has a steering-mounted gear lever, engage first gear to create more working space. Detach the protective trim of the dashboard and undo the four 6 mm screws. Remove the instrument panel, taking care with the electrical connections. At this point, you can remove the black bulb holders: they contain the instrument lights. The reassembly procedure is completed by following the steps performed so far in reverse. Check the correct operation of the replaced lights.
Updated on 19 April 2026 by ScegliAuto
Video tutorial
Related tutorials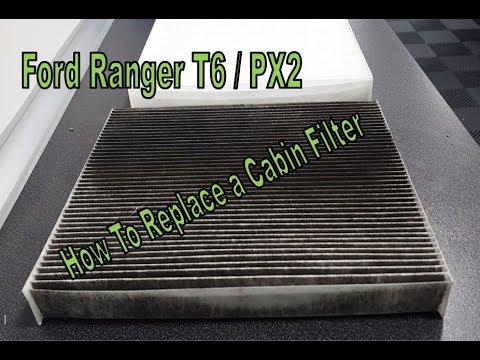
Ford Ford Various
Replace the cabin air filter on a Ford Ranger? Let's see how to remove it from inside the glove compartment. Open the glove compartment and unclip th…

Ford Ford Various
If you intend to replace the bulbs in the instrument cluster, I recommend disconnecting the battery thirty minutes before starting for safety reasons…

Ford Ford Various
To reset the Sync on the Ford radio, turn on the instrument cluster by inserting the ignition key into the corresponding switch. Once the instrument …
Other guides you may be interested in
|
How to Open the Bonnet of a Renault Megane if the Lever is Broken?
If the lever that unlocks the bonnet of the Renault Megane is broken or not functioning, there is an emergency procedure to unlock the mechanism: remove the right front grille located at the top of the bumper. Once the grille is removed, you can locate the actuator mechanism: by pulling the spring in this position, you can unlock the actuator, allowing you to lift the bonnet and access the components located inside the engine compartment. You can then close the bonnet simply by lowering it. by ScegliAuto More videos
|
|
For advertising on this site Write to info@scegliauto.com
ScegliAuto is not responsible for any inaccuracy of the data in the lists. To report any inaccuracy or your business (if you own the business in question), please write to info@scegliauto.com
Number of seconds to generate the page: 0.810
(c) ScegliAuto 2026 - info@scegliauto.com - Privacy policy VAT number: IT01247470535 |
