
|
Do it yourself
| |||
| ||||


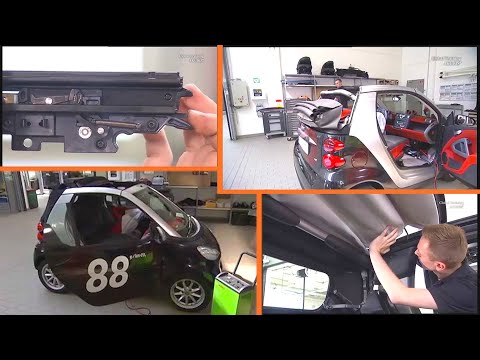
What do the three bars on the Smart Fortwo dashboard indicate?
Model: Smart Smart
451
- Years 2007-2015
When we see the three horizontal bars on the dashboard of our Smart, they indicate a fault or malfunction of the automatic transmission; in fact, it is the warning light for a problem in the transmission system. Sometimes simply stopping, waiting a few minutes and then restarting is enough; the bars disappear. If the bars reappear after the restart, the reason may be a defect in the clutch actuator motor, which wears out over time. The problem could also be the clutch sensor, which does not correctly read the position; even a low level of transmission oil can generate this error. But also a faulty wiring, an oxidized connector or a malfunction of the control unit itself can generate this error. When the three bars appear, the car enters emergency mode, so the performance becomes limited, the gears no longer engage correctly, until they become impossible. It is necessary to take the car to a workshop and have the error codes read from the control unit.
Posted on 15 October 2025 by ScegliAuto
Video tutorial
Related tutorials
Smart
(2007-2015 /
451)
Following today's information, we will see how to reset the service light for the regular maintenance of the engine oil change on the Smart Fortwo. F…
Smart
(2007-2015 /
451)
How do we remove the hood of a Smart Fortwo? Let's see in this video how to proceed: with a screwdriver we remove the side plastic cover edges placed…

Smart
(2004-2006 /
Fourfour1, 454)
Before we begin, we will have to sit in the driver's seat of our Smart ForTwo. In order to be able to carry out this disassembly in complete safety, …
Other guides you may be interested in
|
Installation of Upgraded Intercooler Radiator with Pipes
Lift the vehicle on suitable axle stands, remove the front wheels, and then the front bumper and grille. Proceed to remove the front headlights; drain the coolant, remove the intercooler radiator and the hoses connecting it to the intake system. Position the new intercooler radiator in the grille, temporarily securing it with cable ties, and mark with a marker the part of the metal that needs to be removed to allow the new hoses to pass through. Cut the marked portion of metal and apply a gasket to the edge. Remove the inner cover of the bumper and position it near the radiator to identify any interfering parts to eliminate: again, apply a gasket to the edge of the cut. Create brackets for securing the new radiator and proceed with the installation of the connecting pipes from the radiator to the intake, shaping and connecting them appropriately. Finally, reassemble the bumper, headlights, and grille. by ScegliAuto More videos
|

|
For advertising on this site Write to info@scegliauto.com
ScegliAuto is not responsible for any inaccuracy of the data in the lists. To report any inaccuracy or your business (if you own the business in question), please write to info@scegliauto.com
Number of seconds to generate the page: 0.063
(c) ScegliAuto 2026 - info@scegliauto.com - Privacy policy VAT number: IT01247470535 |