
|
Do it yourself
| |||
| ||||


How do you replace the thermostat on the Volkswagen Polo?
Model: Volkswagen Polo
MK 4, Polo IV, 9N, MK IV, Polo 4
- Years 2001-2009
In order to replace the thermostat on the Volkswagen Polo, you need to go and open the bonnet, in order to have access to the components inside the engine compartment: the thermostat will in fact be found on the right side of the engine block. It can be removed from its housing by unscrewing it and removing the relative fixing ring; once the old thermostat has been removed from inside its seat, it will be possible to insert and fix the new spare part. After installation it will therefore be possible to close the bonnet and check that everything works correctly with the new piece installed.
Posted on 9 January 2023 by ScegliAuto
Video tutorial
Related tutorials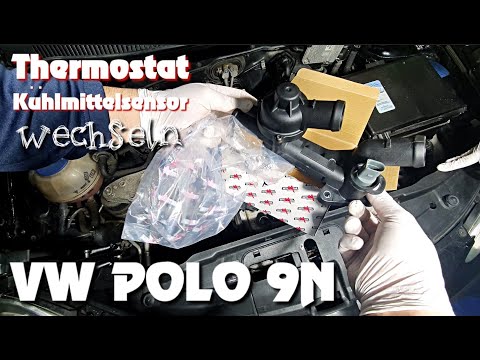
Volkswagen Polo
(2001-2009 /
MK 4, Polo IV, 9N, MK IV, Polo 4)
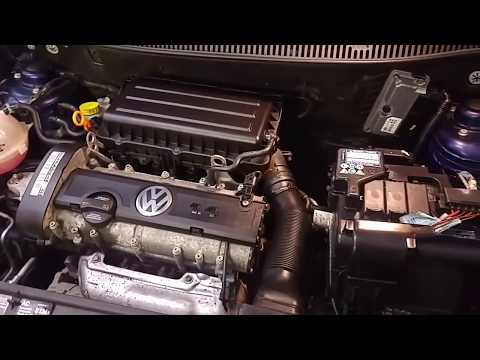
In this tutorial we can see how to replace the thermostat in the Volkswagen Polo, an extremely simple and quick operation. First of all, make sure th…
Volkswagen Polo
(2009-2017 /
MK V, 6R, Polo 5, Polo V, MK 5)
In the following video, learn how to remove the thermostat on a Volkswagen Polo. Open and lift the front bonnet, unscrew the bolts on the thermostat …

Volkswagen Polo
(2001-2009 /
MK 4, Polo IV, 9N, MK IV, Polo 4)
In today's tutorial, you will learn how to remove and replace the coolant thermostat of the Volkswagen Polo 1.2. First, open the bonnet and start by …
Other guides you may be interested in
|
Frequently Asked QuestionsHow to Unlock the Sony Radio in a Ford Focus?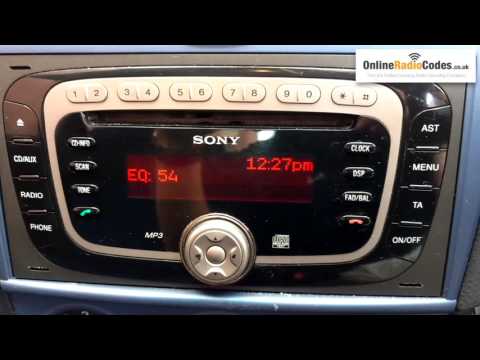
To unlock the Sony radio in a Ford Focus, turn on the ignition so that the radio can also be powered on. Next, press and hold the buttons 1 and 6 on the top of the radio until the serial number of the device appears. This number should then be entered into specific websites: this will allow you to obtain the unlock code for the radio. By entering this four-digit code, you will be able to unlock the radio for use until it is reset again. by ScegliAuto More videos
|
|
For advertising on this site Write to info@scegliauto.com
ScegliAuto is not responsible for any inaccuracy of the data in the lists. To report any inaccuracy or your business (if you own the business in question), please write to info@scegliauto.com
Number of seconds to generate the page: 0.092
(c) ScegliAuto 2026 - info@scegliauto.com - Privacy policy VAT number: IT01247470535 |