
|
Do it yourself
| |||
| ||||


Replacing the Timing Belt on a Hyundai I10
Model: Hyundai I10
PA, MK 1
- Years 2007-2013
Replacing the timing belt on a Hyundai I10, here’s how to do it. Lift the front bonnet of the car; remove the soundproofing panel, air filter housing, and the belt cover. Place the car on a column lift and remove the front wheel and the right wheel arch liner if necessary. Use a spanner to loosen the tensioner pulley and slide the belt off its seat. Use a socket to unscrew the tensioner pulley bolt, then remove the water pump as shown in the video. Fit the new water pump, the tensioner, and the belt itself, tightening everything with the socket. Refit the wheel with the arch liner, the soundproofing panel, the filter housing, and the cover in the engine bay.
Updated on 18 March 2026 by ScegliAuto
Video tutorial
Related tutorials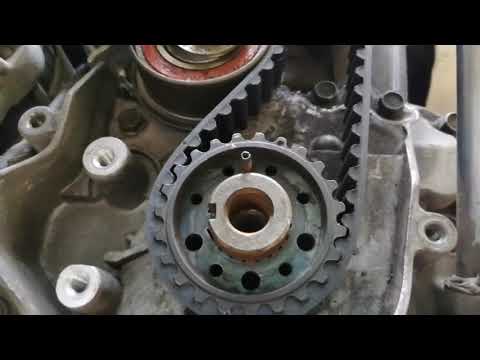
Hyundai I10
(2007-2013 /
PA, MK 1)
This brief guide provides the main instructions on how and when to change the timing belt on the first-generation Hyundai I10 with a 1.1 petrol engin…

Hyundai I10
(2007-2013 /
PA, MK 1)
The replacement of the timing belt on a first-generation Hyundai i10 (2007-2013), both with a 1.1 MPI (petrol) engine and a 1.2 MPI (petrol) engine, …

Hyundai I10
(2007-2013 /
PA, MK 1)
Replacing the water pump of a Hyundai i10 vehicle is a fairly simple operation to perform independently. The water pump of the Hyundai is located nea…
Other guides you may be interested in
|
Frequently Asked QuestionsHow to Open a Stuck Boot on the Peugeot 407?
On the Peugeot 407, the boot may become stuck, possibly due to a problem with the control button or the lock actuator. In such cases, you can perform an emergency opening by following the simple procedure shown in this tutorial. First, open the rear doors, then lower the seat back by operating the release lever. Next, go inside the boot, locate the lock, and manually operate it using a flathead screwdriver. The boot will then be free to open. by ScegliAuto More videos
|

|
For advertising on this site Write to info@scegliauto.com
ScegliAuto is not responsible for any inaccuracy of the data in the lists. To report any inaccuracy or your business (if you own the business in question), please write to info@scegliauto.com
Number of seconds to generate the page: 0.480
(c) ScegliAuto 2026 - info@scegliauto.com - Privacy policy VAT number: IT01247470535 |
