
|
Do it yourself
| |||
| ||||


Thermostat Valve Replacement on Opel Meriva 1.3 MultiJet
Model: Vauxhall Meriva
MK 2, Meriva B
- Years 2010-2017
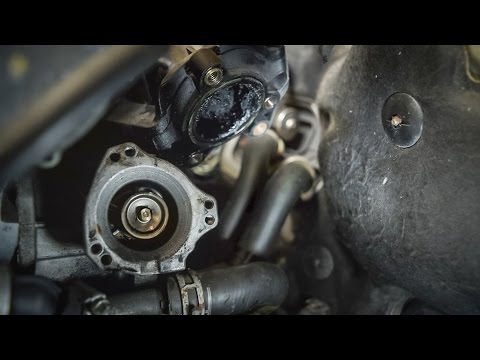
This tutorial is suitable for changing the thermostat on many car models. From the rear of the car's bonnet, unscrew the radiator drain plug and collect the fluid in a container. This fluid can be reused by putting it back into the system once the job is completed. Disconnect the negative terminal and then the positive terminal of the battery. Open and remove the fuel filter (including the connector), as shown in the video. Remove the battery and its lower support. Disconnect the glow plug control unit by unplugging its connector. As a penultimate step, remove the air duct leading to the EGR valve by unscrewing the three screws. Finally, you have reached the thermostat! It is secured by two Torx T45 screws. Reassemble everything in reverse order.
Updated on 1 April 2026 by ScegliAuto
Video tutorial
Related tutorials
Vauxhall Meriva
(2003-2010 /
Meriva A, MK 1)
In order to replace the thermostat of the Opel Meriva, you need to open the hood so that you can access the components located inside the engine comp…
Vauxhall Meriva
(2003-2010 /
Meriva A, MK 1)
To clean the EGR valve of the Opel Meriva, you will need to remove it from its housing inside the engine bay: at this point, to access the valve, ope…

Vauxhall Meriva
(2003-2010 /
Meriva A, MK 1)
In this video tutorial, we will see how to disassemble an Egr valve of the Opel Meriva 1.3 cdti, which is responsible for recovering a percentage of …
Other guides you may be interested in
|
How to Check the Oil Level on a Jeep Renegade?
To check the oil level on a Jeep Renegade, you need to open the bonnet to access the components inside the engine bay: on the lower left side of the engine block, you will find the dipstick for checking the level. This should be pulled out and thoroughly cleaned with a cloth: once cleaned, reinsert it back into its tube and pull it out immediately after. This way, you can check that the oil mark is between the minimum and maximum levels; finally, you can place the dipstick back in its tube. by ScegliAuto More videos
|

|
For advertising on this site Write to info@scegliauto.com
ScegliAuto is not responsible for any inaccuracy of the data in the lists. To report any inaccuracy or your business (if you own the business in question), please write to info@scegliauto.com
Number of seconds to generate the page: 0.707
(c) ScegliAuto 2026 - info@scegliauto.com - Privacy policy VAT number: IT01247470535 |
