
|
Do it yourself
| |||
| ||||


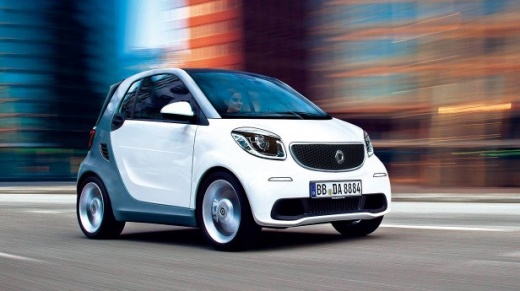
How to deactivate the Start & Stop on a Smart 453 (and Renault Twingo)
Model: Smart Smart
453
- Years 2014-2022
Let's see how to deactivate the start & stop on the Smart 453 (and also on the Renault Twingo). The temporary solution is the one shown in the video, which is to press the button located at the bottom of the dashboard, to the left of the steering wheel, with the red light on. However, it must be pressed every time the car is started, and the deactivation only applies to the current driving cycle. If you want to permanently eliminate it, there are specific emulators or bypasses that connect to the battery sensor or the control unit, such as the "Start Stop Memory module" that can be found on Amazon in one of its many versions with the code B0CMCR53BT at a price of 24.98 euros, delivery in one day with no delivery costs for Prime customers.
Posted on 18 October 2025 by ScegliAuto
Video tutorial
Related tutorials
Smart
(2014-2022 /
453)
In this guide, we will see the main instructions that will allow us to activate and deactivate the Start&Stop system of the Smart Fortwo. First of al…

Smart
(2014-2022 /
453)
In this video we see the main reasons why the Start & Stop function does not work on a Smart 453. However, the reasons are also valid for all other c…

Smart
(2014-2022 /
453)
It will be possible to deactivate the Start&Stop of the Smart by turning on the instrument panel and then locating the button with the letter A insid…
Other guides you may be interested in
|
Installation of Upgraded Intercooler Radiator with Pipes
Lift the vehicle on suitable axle stands, remove the front wheels, and then the front bumper and grille. Proceed to remove the front headlights; drain the coolant, remove the intercooler radiator and the hoses connecting it to the intake system. Position the new intercooler radiator in the grille, temporarily securing it with cable ties, and mark with a marker the part of the metal that needs to be removed to allow the new hoses to pass through. Cut the marked portion of metal and apply a gasket to the edge. Remove the inner cover of the bumper and position it near the radiator to identify any interfering parts to eliminate: again, apply a gasket to the edge of the cut. Create brackets for securing the new radiator and proceed with the installation of the connecting pipes from the radiator to the intake, shaping and connecting them appropriately. Finally, reassemble the bumper, headlights, and grille. by ScegliAuto More videos
|
|
For advertising on this site Write to info@scegliauto.com
ScegliAuto is not responsible for any inaccuracy of the data in the lists. To report any inaccuracy or your business (if you own the business in question), please write to info@scegliauto.com
Number of seconds to generate the page: 0.120
(c) ScegliAuto 2026 - info@scegliauto.com - Privacy policy VAT number: IT01247470535 |