
|
Do it yourself
| |||
| ||||


Eliminating Engine Oil Leak from Valve Cover
Model: Audi A6
C5, MK 2
- Years 1997-2004
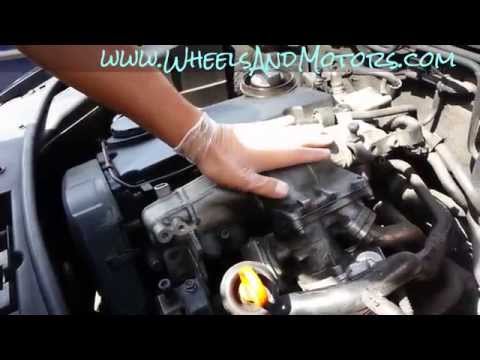
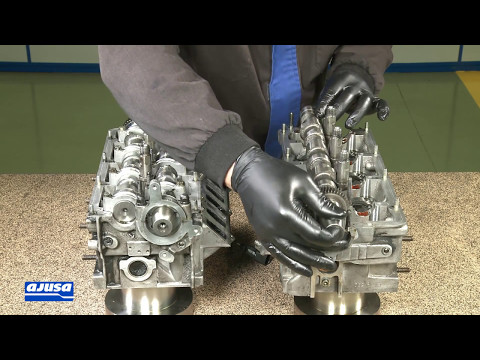
It is recommended to perform this repair only if you have good mechanical knowledge, as the parts involved in disassembly are particularly complex. First, remove the front bumper and the complete cross member with headlights and radiator (you will clearly need to disconnect the plugs and hoses). Then remove the auxiliary belt and the timing belt. Disassemble the air filter cover and the coolant reservoir. Disconnect the spark plug wires and remove the boots. Extract the timing pulley from the upper left and the underlying cover. Then disassemble the valve cover and remove the gaskets (the peripheral and the central one). Then simultaneously extract the two camshafts along with the chain, then the chain tensioner and the end gasket of the camshaft (in a semicircular shape). Reposition the new camshaft gasket, the chain tensioner, and the two camshafts previously removed. Replace the seals and end caps of the camshafts; apply silicone sealant to the edge of the camshaft mounting support and reassemble the support itself. Apply the new gaskets (the peripheral and the central one) of the valve cover and reassemble the cover itself. At this point, reassemble everything: it is suggested to check and possibly replace the timing kit (belt, bearings, and tensioner) and the auxiliary belt.
Updated on 3 February 2026 by ScegliAuto
Video tutorial
Related tutorials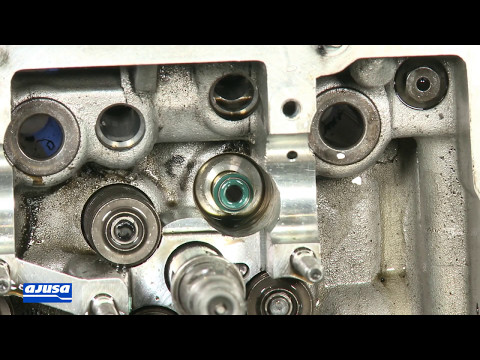
Audi A6
(1997-2004 /
C5, MK 2)
The so-called valve stem seals are actually oil seals: they allow the valve stem to move, enabling it to open and close without oil entering the comb…
Audi A6
(2004-2012 /
C6, MK 3)
If you experience engine performance issues, excessive smoke, and sometimes difficulty starting, there is likely a problem with clogging in the EGR v…
Audi A6
(2004-2012 /
C6, MK 3)
Replacing the cylinder head gasket involves several critical steps during the engine assembly phase. Ensure to replace the gaskets, oil seals, and fa…
Other guides you may be interested in
|
How to Remove the Third Brake Light from a Renault Clio
In this video, we will see how to remove the third brake light from a Renault Clio. First, open the boot lid and remove the plastic rivets with a screwdriver, then close the boot. Extract the third brake light from the metal of the boot lid using your hands. Once the piece is removed from its housing, disconnect the power connector and attach the new third brake light. After fitting the bulbs, insert the piece back into the boot lid and secure it with the plastic rivets. Finally, check the correct operation of the lights after turning on the instrument panel. by ScegliAuto More videos
|
|
For advertising on this site Write to info@scegliauto.com
ScegliAuto is not responsible for any inaccuracy of the data in the lists. To report any inaccuracy or your business (if you own the business in question), please write to info@scegliauto.com
Number of seconds to generate the page: 0.141
(c) ScegliAuto 2026 - info@scegliauto.com - Privacy policy VAT number: IT01247470535 |