
|
Do it yourself
| |||
| ||||


How to Replace the Fuel Filter on a Mitsubishi Pajero
Model: Mitsubishi Pajero
V60, MK 3
- Years:
1999, 2000, 2001, 2002, 2003, 2004, 2005, 2006
Video tutorial
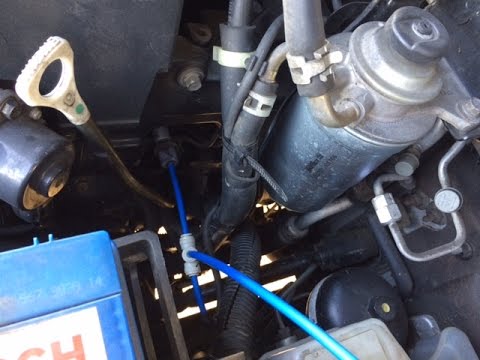
Periodically replacing the fuel filter is very important as a clogged filter can impair engine performance and may cause damage to the high-pressure pump or injectors. The fuel filter on the Pajero is located just beneath the plastic grille under the windscreen, practically behind the battery. Start by disconnecting the sensor attached to the bottom of the filter, then unscrew the filter from its support. It is advisable to empty the old filter to check for any impurities. Remove the sensor from the old filter and attach it to the new one, replacing the O-ring. Install the new filter and then fill it using the manual pump located on the filter support plate before starting the engine.
Updated on 24 February 2026 by ScegliAuto
Related tutorials
Mitsubishi Pajero
(1999-2006 /
V60, MK 3)
The following steps will show us the process of disassembling and replacing the fuel filter of the Mitsubishi Pajero 3.0 V6. First, lift the vehicle …
Mitsubishi Pajero
(1991-1999 /
MK 2, V20)
In this video tutorial, you will learn how to remove the diesel filter from a Mitsubishi Pajero. This operation is not very complicated but requires …

Mitsubishi Pajero
(1999-2006 /
V60, MK 3)
Before you can begin, sit in the driver's seat of your Mitsubishi Pajero. Using a Torx T30 screwdriver, start by unscrewing and removing the screws t…
Other guides you may be interested in
|
How to Remove the Rear Seat of a Hyundai Tucson?
To remove the rear seat of a Hyundai Tucson, follow these steps. Start by moving the front seats to their most forward position to gain space. Next, locate the release lever on the underside of the rear seat, near the floor. Press this lever down while pulling the seat upwards to unlock it from the anchor pins. Once unlocked, tilt the seat upwards and forwards to remove it from its position. Repeat this process for both sides of the rear seat. Be careful of any electrical cables or components that may be connected to the seat during removal. Once the rear seat is removed, the disassembly is complete. by ScegliAuto More videos
|
|
For advertising on this site Write to info@scegliauto.com
ScegliAuto is not responsible for any inaccuracy of the data in the lists. To report any inaccuracy or your business (if you own the business in question), please write to info@scegliauto.com
Number of seconds to generate the page: 0.055
(c) ScegliAuto 2026 - info@scegliauto.com - Privacy policy VAT number: IT01247470535 |
