
|
Do it yourself
| |||
| ||||


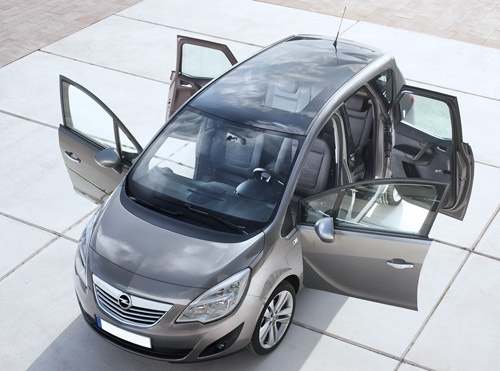
Reliability of the 1.7 CDTi Engine in the Opel Meriva (and Astra/Corsa/Combo)
Model: Vauxhall Meriva
Meriva B, MK 2
- Years:
2010, 2011, 2012, 2013, 2014, 2015, 2016, 2017
Video tutorial
The 1.7 CDTi engine in the Opel is generally reliable but has some critical points to be aware of. The main issue is the injection pump control unit, located at the rear of the engine, where high heat can cause the solder joints to loosen. The solution is to disassemble it and re-solder the weak points. The high-pressure pump solenoids can also cause problems for the same reasons. This engine has a timing belt, not a chain (unlike the 2.0 CDTi). If not replaced at the recommended intervals, it can break and cause severe damage. Up to 186,000 miles, the engine is very robust. Beyond this threshold, turbo failures, oil leaks from injectors, PCV issues (integrated into the valve cover), and head gasket problems may arise. Like many diesels, the EGR valve can also cause issues, but this is a common fault. Overall, it is a good engine, provided you follow meticulous maintenance.
Posted on 16 July 2026 by ScegliAuto
Related tutorials
Vauxhall Meriva
(2003-2010 /
Meriva A, MK 1)
Below are the instructions for removing and replacing the starter motor of the Opel Meriva 1.7 CDTI, following these simple and quick steps. First, l…

Vauxhall Meriva
(2003-2010 /
Meriva A, MK 1)
In this guide we will see the main instructions that will allow us to disassemble and replace the alternator of the Opel Meriva 1.7 CDTi. First of al…

Vauxhall Meriva
(2003-2010 /
Meriva A, MK 1)
In this video tutorial, we will see how to disassemble an Egr valve of the Opel Meriva 1.3 cdti, which is responsible for recovering a percentage of …
Other guides you may be interested in
|
How to Remove the Rear Seat of a Hyundai Tucson?
To remove the rear seat of a Hyundai Tucson, follow these steps. Start by moving the front seats to their most forward position to gain space. Next, locate the release lever on the underside of the rear seat, near the floor. Press this lever down while pulling the seat upwards to unlock it from the anchor pins. Once unlocked, tilt the seat upwards and forwards to remove it from its position. Repeat this process for both sides of the rear seat. Be careful of any electrical cables or components that may be connected to the seat during removal. Once the rear seat is removed, the disassembly is complete. by ScegliAuto More videos
|
|
For advertising on this site Write to info@scegliauto.com
ScegliAuto is not responsible for any inaccuracy of the data in the lists. To report any inaccuracy or your business (if you own the business in question), please write to info@scegliauto.com
Number of seconds to generate the page: 0.052
(c) ScegliAuto 2026 - info@scegliauto.com - Privacy policy VAT number: IT01247470535 |
