
|
Do it yourself
| |||
| ||||


How to Reset the Maintenance Indicator on the Volvo V40 D2 2012
Model: Volvo V40
MK 2
- Years 2012-2019
This brief guide illustrates the procedure to reset the maintenance indicator for the Volvo V40, year 2012. It is noted that the following procedure is also valid and applicable for subsequent models of the V40, up to the year 2019. The steps to follow are as follows: 1. Insert the car key into its slot 2. Press the start button once 3. Set the T2 mode on the instrument cluster using the dial located on the left indicator stalk, behind the steering wheel 4. From the same stalk, press and hold the "OK" button for about 10 seconds 5. Immediately after, press and hold the start button for about 2 seconds 6. During this time, a yellow light will start flashing on the instrument cluster. Once it stops flashing, it will provide an audible feedback. Only after that, release the "OK" button. 7. Congratulations, you have successfully reset the maintenance indicator for your Volvo V40!
Updated on 3 July 2026 by ScegliAuto
Video tutorial
Related tutorials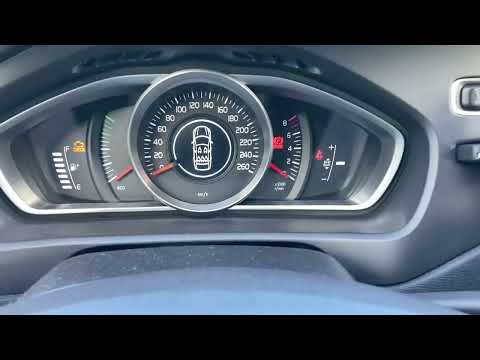
Volvo V40
(2012-2019 /
MK 2)
On the Volvo V40, resetting the Service light is done by turning on the instrument panel by turning the key and then holding down the OK button locat…

Volvo V40
(2012-2019 /
MK 2)
To reset the tire pressure warning light that appears on the instrument panel of the Volvo V40, first inflate the tires to the corresponding pressure…

Volvo V40
(2012-2019 /
MK 2)
It will be possible to completely make the Service light of the Volvo V40 disappear by turning on the instrument panel by turning the key in the igni…
Other guides you may be interested in
|
How to replace the horn on a Renault Duster - Dacia Duster
Today's main instructions will show you the procedure for removing and replacing the horn or sound signal on the Renault Duster, as well as the Dacia Duster. First, open the bonnet of the vehicle and start removing the front bumper by unscrewing all the fixing screws; you will find the horn right in front of the radiator, as shown in the video. At this point, disconnect the electrical connector and unscrew the bracket screw to remove and replace the horn with the new one; finally, reassemble the front bumper! by ScegliAuto More videos
|
|
For advertising on this site Write to info@scegliauto.com
ScegliAuto is not responsible for any inaccuracy of the data in the lists. To report any inaccuracy or your business (if you own the business in question), please write to info@scegliauto.com
Number of seconds to generate the page: 0.193
(c) ScegliAuto 2026 - info@scegliauto.com - Privacy policy VAT number: IT01247470535 |
