
|
Do it yourself
| |||
| ||||


Mazda Mx 5 Years 1989-1997 (MK 1) Mazda Mx 5 (1989-1997 / MK 1)
Where is the rear lights fuse located in the Mazda MX-5? In case the rear lights of our Mazda MX-5 suddenly stop working, and the corresponding bulbs are in good condition, we can check the status of the respective …read all… Posted on 28 August 2023 by ScegliAuto 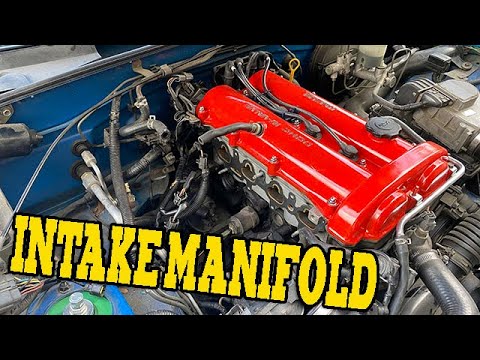 Mazda Mx 5 (1989-1997 / MK 1)
Removing the intake manifold on the Mazda MX-5 Let's see in this video tutorial how to remove the intake manifold on a Mazda Mx5 produced from 1990 to 1993. First we detach the throttle cable from the …read all… Posted on 4 September 2022 by ScegliAuto 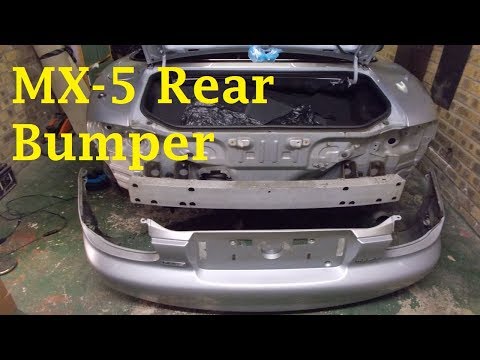 Mazda Mx 5 (1989-1997 / MK 1)
How do I remove the rear bumper of the Mazda MX5 NB? Removing the rear bumper of the Mazda MX5 NB is a simple operation, but you must first remove a lot of screws, the enclosed video guide helps us. Let's start …read all… Posted on 26 April 2024 by ScegliAuto 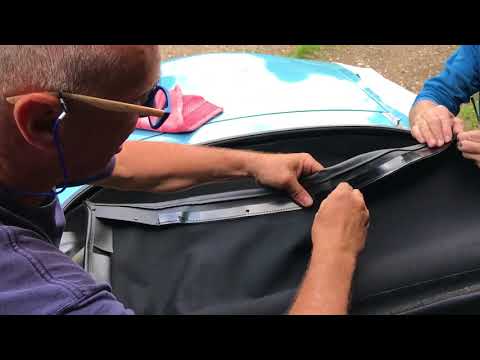 Mazda Mx 5 (1989-1997 / MK 1)
How do you replace the Mazda MX5 soft top? In order to replace the Mazda Mx 5 soft top, first of all you need to clean the rear part and above all the gasket to which the new sheet will be fixed. At …read all… Posted on 4 April 2024 by ScegliAuto  Mazda Mx 5 (1989-1997 / MK 1)
How to replace the odometer cable on the Mazda MX-5 We see in this video the main instructions to remove and replace the odometer cable on the Mazda MX-5, first series. First of all we get on board the car and …read all… Posted on 24 February 2024 by ScegliAuto 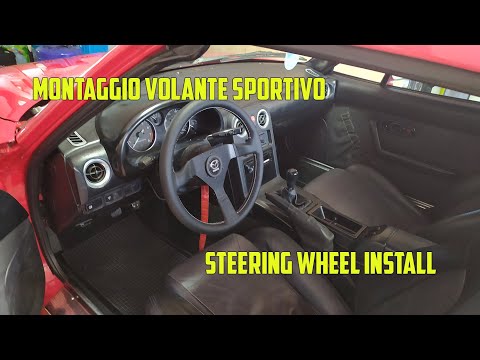 Mazda Mx 5 (1989-1997 / MK 1)
How do you replace the steering wheel on the Mazda MX-5? In order to remove the Mazda MX-5 steering wheel, the battery must first be disconnected to prevent the airbag from bursting. Then you will need to unscrew …read all… Posted on 23 February 2024 by ScegliAuto  Mazda Mx 5 (1989-1997 / MK 1)
Installing a car seat heater The guide below shows how to install a car seat heater. With the help of tools such as: screwdriver, pliers and drill the various parts of the seat are …read all… Posted on 21 July 2023 by ScegliAuto  Mazda Mx 5 (1989-1997 / MK 1)
Headlight replacement Due to aging and bad weather, the headlights tend to yellow and need to be replaced. In order to replace the headlight it is necessary to open the front hood …read all… Posted on 18 July 2023 by ScegliAuto  Mazda Mx 5 (1989-1997 / MK 1)
IPhone adapter accessory kit installation Using the special tools that are inserted into the slots above and below the car radio to release the retaining springs, slide out the complete console and …read all… Posted on 14 July 2023 by ScegliAuto  Mazda Mx 5 (1989-1997 / MK 1)
Front and rear bumper spoiler installation Raise the car on suitable car stands or on a lift to facilitate installation operations. The fixing screws are also included in the spoiler kit: it will …read all… Posted on 13 July 2023 by ScegliAuto |
See also:
Handbrake adjustment on Ford Ecosport
First remove the plastic profile at the base of the gear lever. To do this, slightly widen the side edges and carefully lift it to release it. There is no need to remove it completely, just move it forward to avoid bother. Now remove the plastic center console around the handbrake by first working from the rear to release it and lifting it until the brake lever passes. Also in this case it is not necessary to remove it completely but, paying attention to the connected cables, it can be stowed in front of the passenger seat. At this point we notice that at the base of the handbrake lever, on the front, we find a nut. By acting on it, with a 10 wrench, we can adjust the brake force, increasing it by turning the nut clockwise, or decreasing it by turning it counterclockwise. Once adjusted, the center console can be repositioned first, pressing lightly to engage it, and then the profile of the gearbox base. by ScegliAuto More videos
|
|
For advertising on this site Write to info@scegliauto.com
ScegliAuto is not responsible for any inaccuracy of the data in the lists. To report any inaccuracy or your business (if you own the business in question), please write to info@scegliauto.com
Number of seconds to generate the page: 0.006
(c) ScegliAuto 2024 - info@scegliauto.com - Privacy Policy VAT number: IT01247470535 |