
|
Do it yourself
| |||
| ||||


How to repair the valve cover gasket leak on the Nissan Almera Tino
Model: Nissan Tino
MK 1
- Years:
2000, 2001, 2002, 2003, 2004, 2005, 2006
Video tutorial
Let's see how to repair the valve cover gasket leak on the Nissan Almera Tino. Start by removing the cover and taking out the ignition coils (keeping them in sequence); unscrew the 14 bolts of 10 mm around the cover, disconnect any obstructing pipes and air hoses, and carefully remove the cover. Clean the contact surface on the cylinder head thoroughly, removing all traces of the old gasket. You can find the new gasket on eBay with code 286991052304 (for petrol) at a price of £52.72 with free delivery; it fits perfectly, but it is advisable to use a small amount of gasket sealant at critical points (such as corners). Reposition the cover without over-tightening, start the engine, and check for any leaks.
Posted on 6 July 2026 by ScegliAuto
Related tutorials
Nissan Tino
(2000-2006 /
MK 1)
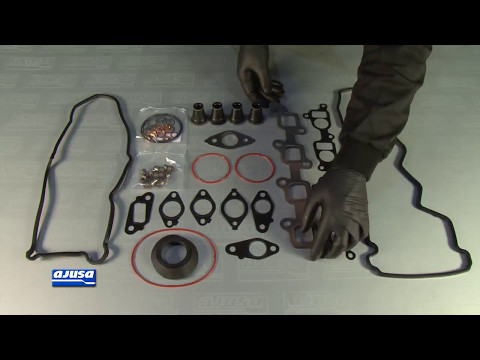
When refurbishing a cylinder head, it is good practice to also replace the valve guide seals, which are generally included in the gasket kit. Once th…

Nissan Tino
(2000-2006 /
MK 1)
The rocker arm is a device that maintains zero play in an internal combustion engine. If this play is not maintained, the valve and its pivot would s…
Nissan Tino
(2000-2006 /
MK 1)
It is recommended to perform this maintenance with the engine cold, as components that come into contact with exhaust gases reach high temperatures. …
Other guides you may be interested in
|
How to Remove the Rear Seat of a Hyundai Tucson?
To remove the rear seat of a Hyundai Tucson, follow these steps. Start by moving the front seats to their most forward position to gain space. Next, locate the release lever on the underside of the rear seat, near the floor. Press this lever down while pulling the seat upwards to unlock it from the anchor pins. Once unlocked, tilt the seat upwards and forwards to remove it from its position. Repeat this process for both sides of the rear seat. Be careful of any electrical cables or components that may be connected to the seat during removal. Once the rear seat is removed, the disassembly is complete. by ScegliAuto More videos
|
|
For advertising on this site Write to info@scegliauto.com
ScegliAuto is not responsible for any inaccuracy of the data in the lists. To report any inaccuracy or your business (if you own the business in question), please write to info@scegliauto.com
Number of seconds to generate the page: 0.024
(c) ScegliAuto 2026 - info@scegliauto.com - Privacy policy VAT number: IT01247470535 |
