
|
Do it yourself
| |||
| ||||


1997-2002 Subaru Forester (MK 1, SF)
Tutorial - For model years: 1997, 1998, 1999, 2000, 2001, 2002
Mechanics (2)Electrical System and Lighting (2)Air Conditioning and Cooling (1)Bodywork and Windows (4)Vehicle Controls and Functions (2) Subaru Forester (1997-2002 / SF, MK 1) How to Replace the Front Headlight Bulb in a 2000 Subaru Forester The procedure to correctly replace the front headlight bulb in your first-generation 2000 Subaru Forester is very simple, and with this guide, you will have no …Read all… Posted on 10 October 2026 by ScegliAuto  Subaru Forester (1997-2002 / SF, MK 1) Where to Find the Fuse Box in a Subaru Forester To safely locate the fuse box in your first-generation Subaru Forester (1997-2002), follow the instructions in this guide. First, park the car on a flat …Read all… Posted on 10 August 2026 by ScegliAuto  Subaru Forester (1997-2002 / SF, MK 1) How to Locate the Fuses and Understand Their Schematics in a Subaru Forester The first fuse panel in a Subaru Forester can be found inside the vehicle's cabin, located at the bottom left of the steering wheel, behind the dashboard. This …Read all… Posted on 27 August 2026 by ScegliAuto  Subaru Forester (1997-2002 / SF, MK 1) Basic DIY Maintenance for a Subaru Forester In this video, learn how to perform basic DIY maintenance on a first-generation Subaru Forester. For the oil and filter replacement, you will need a large …Read all… Posted on 16 August 2026 by ScegliAuto  Subaru Forester (1997-2002 / SF, MK 1) How to Replace the Radiator of the Subaru Forester? To replace the radiator of the Subaru Forester, access the lower part of the engine bay to loosen the screws securing the cover behind the bumper. This will …Read all… Posted on 13 June 2026 by ScegliAuto  Subaru Forester (1997-2002 / SF, MK 1) How to Replace the Panoramic Roof Glass of the Subaru Forester? To replace the panoramic roof glass of the Subaru Forester, you need to remove the plastic covers located at the four corners of the panel. Once the covers are …Read all… Posted on 6 June 2026 by ScegliAuto  Subaru Forester (1997-2002 / SF, MK 1) Removal and Maintenance of Door Tools Using a flathead screwdriver, remove the triangular cover located at the mirror point, the speaker cover near the handle, the cap covering the screw in the …Read all… Posted on 6 March 2026 by ScegliAuto 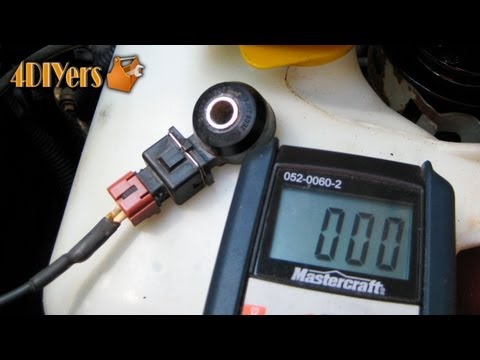 Subaru Forester (1997-2002 / SF, MK 1) Testing the Knock Sensor in Your Car The knock sensor detects if the combustion of the air-fuel mixture in the engine cylinders occurs incorrectly, that is, under detonation conditions. Detonation …Read all… Posted on 3 March 2026 by ScegliAuto  Subaru Forester (1997-2002 / SF, MK 1) Removing the External Rear-View Mirror To remove the external rear-view mirror, you must first take off the door trim panel to access the connector that links it to the electric adjustment system. …Read all… Posted on 1 March 2026 by ScegliAuto  Subaru Forester (1997-2002 / SF, MK 1) Removal of Front Wing and Antenna Removing the front wing is quite straightforward: it involves unscrewing the fastening bolts around the perimeter. However, before proceeding with the wing …Read all… Posted on 27 February 2026 by ScegliAuto  Subaru Forester (1997-2002 / SF, MK 1) Painting Wiper Arm Mechanisms If the wiper arm mechanisms are oxidised and the coating paint has flaked off in some areas, you can restore them to like-new condition without replacing them; …Read all… Posted on 26 February 2026 by ScegliAuto  Subaru Forester (1997-2002 / SF, MK 1) Knock Sensor Replacement The knock sensor is used to identify any abnormal combustion in the combustion chamber (knocking or pinging). Knock sensors enable particularly efficient …Read all… Posted on 25 February 2026 by ScegliAuto |
See also:
How to Remove the Toll Tag Holder from the Car Windscreen
The toll tag holder is usually attached to the car windscreen to ensure that the toll tag functions immediately when passing through barriers. However, if you decide to remove the holder, you should follow this procedure: - Insert the toll tag into the holder; - Pull the holder inwards to detach it from the windscreen; you can use a glass scraper or a stiff plastic card to assist you; After removing the holder, it is essential to remove the adhesive from the windscreen. To remove the adhesive, we recommend using a solvent-based spray that will remove the glue without clouding the area. by ScegliAuto More videos
|
|
For advertising on this site Write to info@scegliauto.com
ScegliAuto is not responsible for any inaccuracy of the data in the lists. To report any inaccuracy or your business (if you own the business in question), please write to info@scegliauto.com
Number of seconds to generate the page: 0.025
(c) ScegliAuto 2026 - info@scegliauto.com - Privacy policy VAT number: IT01247470535 |
