
|
Do it yourself
| |||
| ||||


How to Replace the Timing Belt on the Citroen C3
Model: Citroen C3
SY, SX
- Years 2016-2023
To replace the timing belt on the Citroen C3 1.2 petrol, start by disconnecting the connectors of the spark plug coils, disconnect the throttle connector, disconnect the intake manifold pressure sensor connector, disconnect the lambda sensor connector, disconnect the positive battery terminal clamp, remove the air filter box hose, unscrew the bolt of the box with the hose clamp to remove the entire box, unscrew the clamps of the junction box and move it aside, remove the battery cover, disconnect the negative battery terminal clamp, move the engine control unit, unscrew the bolts holding the battery to remove it, remove the front screws of the intake manifold, remove the spark plug coils, disconnect the radiator hose and drain the cooling circuit. Now proceed to remove the 4 screws of the throttle; disconnect the coolant hose from the thermostat; before removing the intake manifold, remove the canister solenoid from the metal bracket, then remove the 4 rear screws of the intake manifold and slide it out; now act on the tensioner screw, loosen the belt and remove it; also remove the tensioner; cut the water pump belt by removing it; unscrew the 3 fixing screws of the crankshaft pulley; unscrew the 4 screws of the access cover to the timing belt tensioner and idler; remove the head cover screws following the tightening sequence indicated by the manufacturer; remove the solenoids of the variable valve timing checking the cleanliness of the filters and the integrity of the O-ring; lock the variator by rotating the shaft counter-clockwise (it should then rotate with the shaft in both directions). If it does not lock, it must be replaced; lock the variator by rotating the shaft clockwise (it should then rotate with the shaft in both directions). If it does not lock, it must be replaced; insert the pin for the timing of the crankshaft on the flywheel (special tool); check the correct position of the camshafts; insert the special timing tool on the camshafts securing it; using a special tool, check the conditions of the used timing belt are within tolerance, comparing it with the new one (see in the video); remove the tensioner; also remove the idler; extract the crankshaft flange after removing its screw; remove the seal ring from the flange; remove the timing belt by taking out the 2 variable valve timing units; take the new timing kit with the new belt, new tensioner, and new idler; insert the new belt taking care not to bend it excessively to avoid damaging its fibreglass structure; correctly position the key of the variable valve timing ensuring the tightening torque (replace the screw); position the new idler; position the new tensioner bringing the screw close without tightening it; adjust the tensioner by turning the Allen key counter-clockwise (paying attention to the tightening torque), see the correct adjustment of the tensioner in the video; install the new seal ring of the flange; reassemble the idler and tensioner cover paying attention to the tightening torque; tighten the new central screw of the crankshaft pulley to the correct tightening torque; remove the timing tools (crankshaft and camshafts); perform 2 turns of the crankshaft acting on the central screw of the crankshaft pulley; check the engine timing again using the timing tools, remove the timing tools and reassemble the components in the reverse order of disassembly and replace the gaskets where present; remove the 4 screws of the water pump; clean the contact surface of the water pump on the block; position the new gasket on the new water pump and bend the tabs to secure it; position the new water pump and screw in the bolts paying attention to the tightening torque; using the vacuum equipment, fill the engine cooling circuit with the quantity and type of fluid indicated by the manufacturer; check the correct operation of the engine radiator fan and the operation of the cabin heating system; ensure the correct positioning of the pulley by tightening the bolts with the correct torque; install the elastic belt of the water pump; use the special tool as shown in the video (the belt must be correctly inserted into the grooves of the 2 pulleys); clean the surface where the tensioner rests (during assembly, respect the positioning of the centering pin and the tightening torque); install the auxiliary belt in the sequence shown in the video; slightly load the tensioner and remove the safety pin; insert the belt correctly into the grooves of the pulleys; drain the engine oil by unscrewing the drain plug of the oil sump; replace the engine oil filter with a special key; remove the engine oil sump; check if the pump suction strainer is clean; clean the oil sump by removing any residues; assemble the oil sump using the sealant indicated by the manufacturer; use the engine oil and the quantity indicated by the manufacturer. Reassemble the other components in the reverse order of disassembly, paying attention to any tightening torque.
Updated on 25 August 2026 by ScegliAuto
Video tutorial
Related tutorials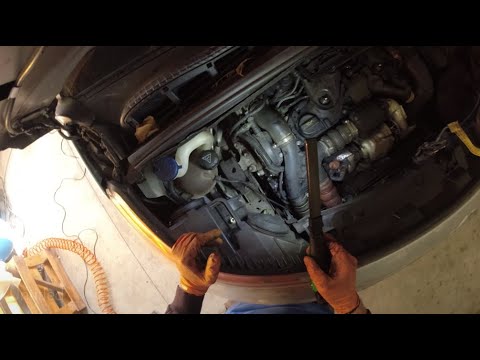
Citroen C3
(2002-2009 /
FC, FN)
This guide outlines the steps to remove and replace the timing belt on a Citroen C3 1.6 HDI. Remember, the timing belt should be replaced every 112,0…

Citroen C3
(2016-2023 /
SY, SX)
Today we will look at the useful instructions for removing and replacing the timing belt on the Citroen C3 1.2 Puretech; the timing belt replacement …

Citroen C3
(2002-2009 /
FC, FN)
.. In today's video, you will learn how to replace the timing belt on the Citroen C3. First, position the car on a lift to raise the vehicle.. …
Other guides you may be interested in
|
How to Open the Bonnet on the Lancia Y
To open the bonnet on this vehicle, follow these simple instructions: first, open the driver's door and locate the lever positioned just below the dashboard, marked with an image of the vehicle with the bonnet open. Pull this lever towards you until you hear a "click" indicating the bonnet is released. Next, exit the cabin and stand in front of the bonnet to disengage the safety catch and complete the opening. To do this, slightly lift the bonnet, locate the yellow lever underneath, and pull it to the left to fully release and open the bonnet. by ScegliAuto More videos
|
|
For advertising on this site Write to info@scegliauto.com
ScegliAuto is not responsible for any inaccuracy of the data in the lists. To report any inaccuracy or your business (if you own the business in question), please write to info@scegliauto.com
Number of seconds to generate the page: 1.025
(c) ScegliAuto 2026 - info@scegliauto.com - Privacy policy VAT number: IT01247470535 |
