
|
Do it yourself
| |||
| ||||


Cylinder Head Gasket Replacement
Model: Ford Fiesta
MK V, Fiesta 5, MK 5
- Years 2002-2008
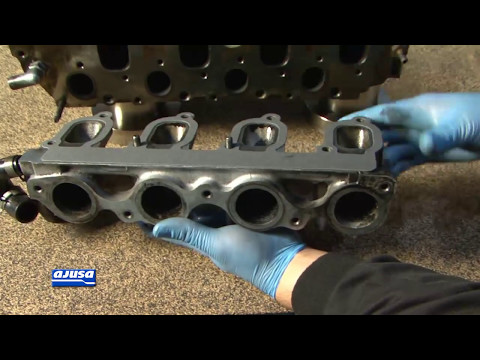
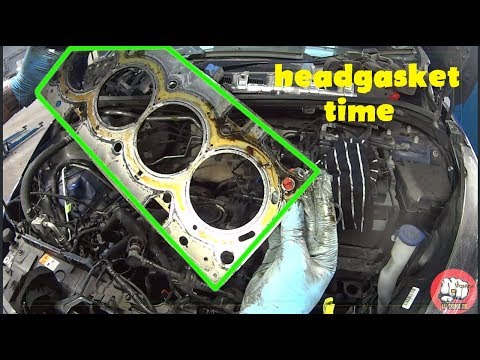
When replacing the cylinder head gasket, it is advisable to take a very cautious approach in assembling the engine, replacing all parts that have been subject to wear, primarily the set of gaskets; once the flatness of the surfaces is verified, proceed with replacing the valve guide seals using the appropriate arch clamp for disassembling and reassembling the valves; then apply the new gasket and the exhaust manifold; check the piston interference, re-tap the threads of the head fixing holes, apply the new gasket and then the cylinder head, using a new set of bolts for securing it, employing both a torque wrench and a calibrated wrench; proceed to install a new camshaft, lubricating the moving parts and applying gasket sealant under the fixing plate; install the timing belt pulley, align the timing marks and fit the belt; then install the injectors, the rocker cover with new gaskets, the turbocharger, and the associated lubrication pipe.
Updated on 17 February 2026 by ScegliAuto
Video tutorial
Related tutorials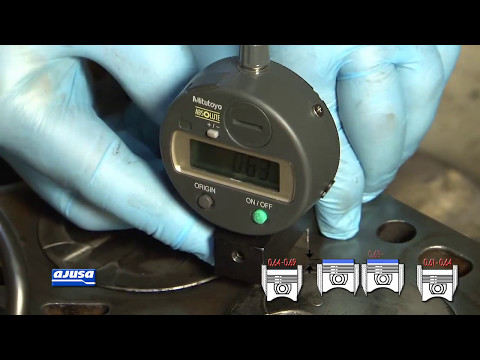
Ford Fiesta
(1996-2002 /
Be91, MK IV, MK 4, Fiesta 4)
Before applying the new cylinder head gasket, ensure that the surface of the head and the cylinder block is perfectly flat: use a straight bar and a …
Ford Fiesta
(1996-2002 /
Be91, MK IV, MK 4, Fiesta 4)
Before applying the new gasket to the intake manifold, thoroughly clean the gasket seating on both the cylinder head and manifold sides: remove any d…
Ford Fiesta
(2008-2017 /
MK 6, MK VI, Fiesta 6)
The main steps today will show us how to disassemble and replace the head gasket of the Ford Fiesta. First, we open the car's engine hood and begin t…
Other guides you may be interested in
|
Installation of Upgraded Intercooler Radiator with Pipes
Lift the vehicle on suitable axle stands, remove the front wheels, and then the front bumper and grille. Proceed to remove the front headlights; drain the coolant, remove the intercooler radiator and the hoses connecting it to the intake system. Position the new intercooler radiator in the grille, temporarily securing it with cable ties, and mark with a marker the part of the metal that needs to be removed to allow the new hoses to pass through. Cut the marked portion of metal and apply a gasket to the edge. Remove the inner cover of the bumper and position it near the radiator to identify any interfering parts to eliminate: again, apply a gasket to the edge of the cut. Create brackets for securing the new radiator and proceed with the installation of the connecting pipes from the radiator to the intake, shaping and connecting them appropriately. Finally, reassemble the bumper, headlights, and grille. by ScegliAuto More videos
|
|
For advertising on this site Write to info@scegliauto.com
ScegliAuto is not responsible for any inaccuracy of the data in the lists. To report any inaccuracy or your business (if you own the business in question), please write to info@scegliauto.com
Number of seconds to generate the page: 0.068
(c) ScegliAuto 2026 - info@scegliauto.com - Privacy policy VAT number: IT01247470535 |