
|
Do it yourself
| |||
| ||||


Vauxhall Meriva - Video tutorial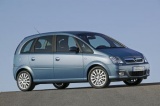
Model: Vauxhall Meriva
Meriva A, MK 1
- Years 2003-2010 The diagram of the car fuse box in the passenger compartment on the lower left side of the dashboard is as follows: one Central control unit; 2 Immobilizer, emergency lights, external lighting; 3 Headlight cleaning system; four Infotainment system, diesel engine; five - 6 - 7 Starter motor, diesel engine: engine controller; eight horns; nine Fuel injection system, fuel pump, fixed heater; ten Blinders; eleven Infotainment system, Information display, Infotainment system; 12 Heated rear window, exterior mirrors; 13 Central locking, anti-theft alarm system; fourteen Petrol engine control; fifteen Engine control unit, Z 17 DTH engine sixteen Accessory socket, cigarette lighter; 17 â € “eighteen Adaptive front lighting; nineteen Central locking system; winds Interior lighting, reading light; 21 Windscreen washer system; 22 Rear electric window; 23 Tilt / Sliding Sunroof, Sunroof; 24 Anti-theft alarm system; 25 Rear wiper; 26 Ignition system, engine electronics; 27 Engine, airbag, ESP control; 28 Air conditioning system; 29 Left front electric window; thirty - 31 Engine control, Z 17 DTH engine; 32 Right front electric window; 33 Central control module, immobilizer, control indicators; 34 Windscreen wipers; 35 Interior lighting, interior mirror, information display; 36 Brake light, ABS, ESP; 37 Cigarette lighter, auxiliary heater; 38 Heated seat (left); 39 Seat heating (right); 40 Adaptive front lighting, automatic headlight depth adjustment; 41 Reversing lights; 42 Engine cooling, lighting; 43 44 Right position light; 45 Rear fog light; 46 Fog lights; 47 Towing equipment, accessory socket; 48 Fuel filter heater; 49 - fifty Fuel filter heater; 51 Left dipped headlight: Xenon headlight Halogen headlight; 52 Right dipped headlight: Xenon headlight Halogen headlight; 53 Sunroof, electric windows, radio; 54 Main beam (left); 55 Main beam (right).
Posted on 4 May 2024 by ScegliAuto
Other guides that may interest you
|
Frequently Asked QuestionsHandbrake adjustment on Ford Ecosport
First remove the plastic profile at the base of the gear lever. To do this, slightly widen the side edges and carefully lift it to release it. There is no need to remove it completely, just move it forward to avoid bother. Now remove the plastic center console around the handbrake by first working from the rear to release it and lifting it until the brake lever passes. Also in this case it is not necessary to remove it completely but, paying attention to the connected cables, it can be stowed in front of the passenger seat. At this point we notice that at the base of the handbrake lever, on the front, we find a nut. By acting on it, with a 10 wrench, we can adjust the brake force, increasing it by turning the nut clockwise, or decreasing it by turning it counterclockwise. Once adjusted, the center console can be repositioned first, pressing lightly to engage it, and then the profile of the gearbox base. by ScegliAuto More videos
|
|
For advertising on this site Write to info@scegliauto.com
ScegliAuto is not responsible for any inaccuracy of the data in the lists. To report any inaccuracy or your business (if you own the business in question), please write to info@scegliauto.com
Number of seconds to generate the page: 0.115
(c) ScegliAuto 2024 - info@scegliauto.com - Privacy Policy VAT number: IT01247470535 |