
|
Do it yourself
| |||
| ||||


How to Replace the Brake Disc
Model: Volkswagen Passat
3BG, B5
- Years:
1996, 1997, 1998, 1999, 2000, 2001, 2002, 2003, 2004, 2005
Video tutorial
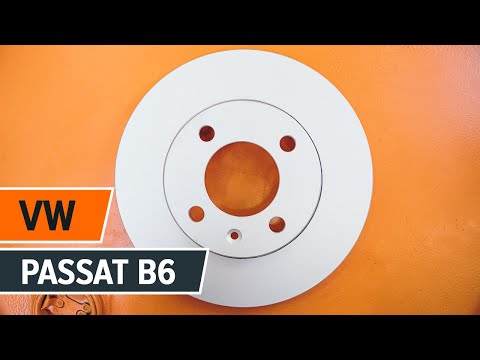
Both the braking system and the discs of the vehicle are crucial for ensuring maximum efficiency, benefiting the safety of both the driver and passengers. This procedure can be carried out independently without needing to visit a trusted mechanic, provided you have a good level of manual dexterity. First, turn the steering wheel to your side so that the brake caliper faces you. Lift the car with a jack and remove the wheel after taking off the wheel bolts. Use an Allen key to unscrew all the bolts on the back that secure the caliper to the frame. At this point, only the caliper bracket with the brake pads inside will remain. Remove the pads using an appropriate flat screwdriver, taking care not to damage the disc. Then, unscrew the bolts that firmly hold the bracket to the hub. At this point, only the brake disc will remain, which needs to be replaced.
Updated on 22 February 2026 by ScegliAuto
Related tutorials
Volkswagen Passat
(2005-2010 /
B6, 3C)
Before starting, lift the front end of your Volkswagen Passat. Begin by unscrewing and removing the bolts that secure the front wheel, then remove th…

Volkswagen Passat
(2005-2010 /
B6, 3C)
Learn how to remove the front brake disc and pads on a Volkswagen Passat. Position your car on a column lift, raising it to a comfortable height for …
Volkswagen Passat
(2005-2010 /
B6, 3C)
Are the rear brake pads worn? Here’s how to replace them inside the brake caliper. Lift the car on a jack, then remove the wheel (using a socket wren…
ScegliAuto offers an extensive international collection of automotive tutorials available in 12 languages. Each guide combines instructional videos with original explanations written by experienced human editors, along with information about the car models covered.
Other guides you may be interested in
|
How to Reset the Tyre Warning Light on the Hyundai I10
The tyre warning light on the instrument panel of your Hyundai I10 (third series) alerts you when there is a puncture or when the tyres are inflated to the wrong pressure. If it lights up accidentally, you can reset it manually by following these steps. Once the instrument panel is on, press the directional button located on the right side of the steering wheel and find the tyre pressure display screen. Finally, press and hold the "OK" button for a few seconds and select the "Set" option to complete the reset of the light. by ScegliAuto More videos
|
|
For advertising on this site Write to info@scegliauto.com
ScegliAuto is not responsible for any inaccuracy of the data in the lists. To report any inaccuracy or your business (if you own the business in question), please write to info@scegliauto.com
Number of seconds to generate the page: 0.107
(c) ScegliAuto 2026 - info@scegliauto.com - Privacy policy - About us VAT number: IT01247470535 |
