
|
Do it yourself
| |||
| ||||


Mazda 3 - Car stereo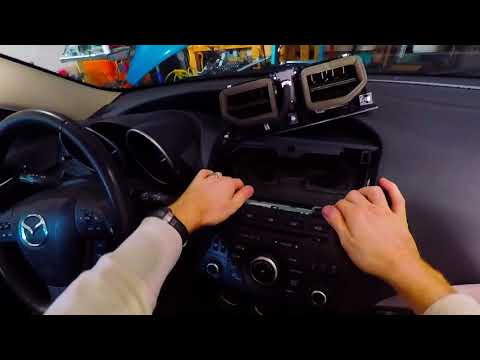 Mazda 3 (2009-2013 / MK 2, BL)
Removal of the radio from the Mazda 3 MK2 Let's see how to proceed to disassemble the radio of the Mazda 3, in case we want to replace it with a model with better audio characteristics. Using a thin …read all… Posted on 5 April 2024 by ScegliAuto  Mazda 3 (2003-2009 / BK, MK 1)
How to disassemble the original car stereo on Mazda 3 MK1 Let's see how to disassemble the original car radio on a Mzda 3 first series, following the instructions below. First of all we go inside the car and we go to …read all… Posted on 17 January 2024 by ScegliAuto 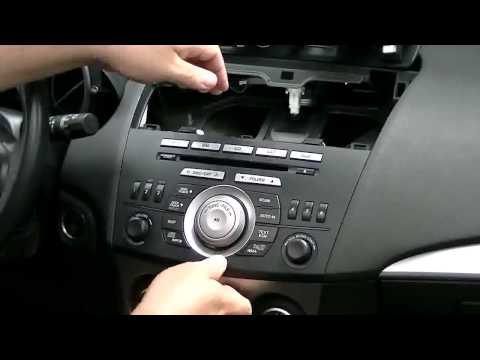 Mazda 3 (2009-2013 / MK 2, BL)
Removal of the original car radio Removing the stock radio from your car is important if you want to fit a better, newer one or if the current one works badly. It is interlocking and to …read all… Posted on 24 July 2023 by ScegliAuto 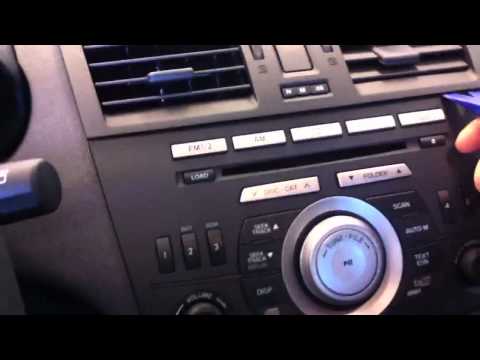 Mazda 3 (2009-2013 / MK 2, BL)
Car radio disassembly instructions In order to disassemble the original car radio, no special tools or extractors are required, but simply unhook the air vents located in the center of the …read all… Posted on 18 July 2023 by ScegliAuto  Mazda 3 (2003-2009 / BK, MK 1)
Replacement of radio and LCD display Using a plastic tool to avoid damaging the body, pry around the display bezel to release the plastic catches in order to access the radio console retaining …read all… Posted on 17 July 2023 by ScegliAuto 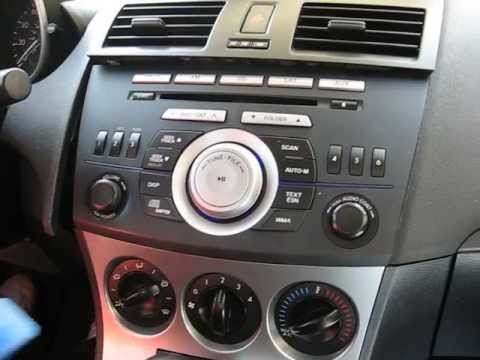 Mazda 3 (2009-2013 / MK 2, BL)
Complete disassembly of the car radio Using a plastic tool to avoid damaging the body, pry the dashboard air vent and remove it from its housing. Remove the lower panel of the radio and unscrew the …read all… Posted on 14 July 2023 by ScegliAuto 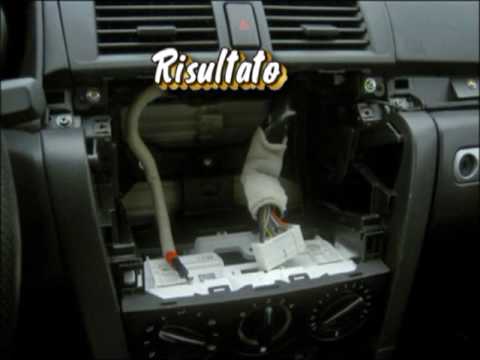 Mazda 3 (2003-2009 / BK, MK 1)
Quick disassembly of the car radio Do you want to replace the stock car stereo, or install a satellite navigator? Here's how to do it in a few steps, first we open the glove box, remove the …read all… Posted on 19 June 2023 by ScegliAuto Cigarette Lighter (1) Airbags (4) Alternator (3) Loudspeaker (2) Shock absorbers (7) Air conditioning (5) Car stereo (7) Anti roll bar (1) Battery (6) Air Vents (1) Spark plugs (8) Bodywork (3) Key (24) V-belt (1) -board computer (10) Checks and maintenance (32) Throttle body (1) Dashboard (2) Brake discs (2) Headlight (3) Tail light (4) Fog lights (1) Air filter (5) Cabin air filter (10) Petrol filter (2) Diesel filter (3) Oil filter (3) Hand brake (1) Grille (1) Accessory Kit (10) Xenon headlight kit (1) Light bulb (5) Side turn signal light bulb (2) Headlight bulb (12) Rear light bulb (5) Interior lights ceiling light bulb (2) Antifreeze liquid (1) Handle (5) Engine (1) Gear oil (2) Brake oil (1) Engine oil (14) Power steering oil (1) Door panel (5) Front bumper (6) Rear bumper (1) Brake pads (6) Tires (8) Gear Shift Knob (1) Pump (1) Instrument cluster (14) Radiator (1) Fuse box (10) Seat (4) Coolant temperature sensor (3) Outside rearview mirror (9) Interior rearview mirror (1) Manufacturer's coat of arms (1) Windscreen wipers (4) Central tunnel (2) Valve (1) Interior blower (1) Steering wheel (1) |
Handbrake adjustment on Ford Ecosport
First remove the plastic profile at the base of the gear lever. To do this, slightly widen the side edges and carefully lift it to release it. There is no need to remove it completely, just move it forward to avoid bother. Now remove the plastic center console around the handbrake by first working from the rear to release it and lifting it until the brake lever passes. Also in this case it is not necessary to remove it completely but, paying attention to the connected cables, it can be stowed in front of the passenger seat. At this point we notice that at the base of the handbrake lever, on the front, we find a nut. By acting on it, with a 10 wrench, we can adjust the brake force, increasing it by turning the nut clockwise, or decreasing it by turning it counterclockwise. Once adjusted, the center console can be repositioned first, pressing lightly to engage it, and then the profile of the gearbox base. by ScegliAuto More videos
|
|
For advertising on this site Write to info@scegliauto.com
ScegliAuto is not responsible for any inaccuracy of the data in the lists. To report any inaccuracy or your business (if you own the business in question), please write to info@scegliauto.com
Number of seconds to generate the page: 0.011
(c) ScegliAuto 2024 - info@scegliauto.com - Privacy Policy VAT number: IT01247470535 |