
|
Do it yourself
| |||
| ||||


Mazda 3 - DashboardDashboard Mazda 3 (2019-2026 / mk 4, bp) Mazda 3 (2013-2019 / BN, MK 3, BM)
How to Remove the Centre Console of the Mazda 3 Today, you will learn how to remove the upper and lower centre console of the Mazda 3. For this simple operation, no special tools are required, such as a …Read all… Posted on 10 February 2026 by ScegliAuto  Mazda 3 (2019-2026 / MK 4, BP)
Where is the OBD port located on the Mazda 3? To locate the OBD port inside your Mazda 3, you do not need to remove any components. All you have to do is carefully read the following guide and follow all …Read all… Posted on 6 December 2024 by ScegliAuto 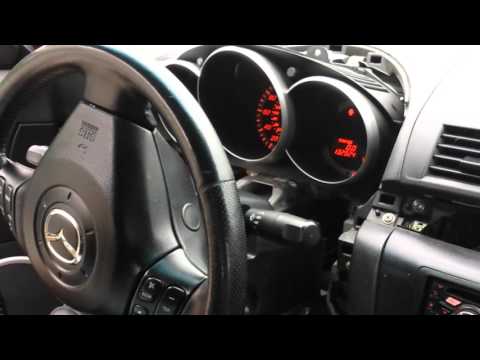 Mazda 3 (2003-2009 / BK, MK 1)
Instructions for Removing Instrument Cluster To remove the instrument cluster, it is necessary to remove some trim elements from the dashboard: start by detaching the central trim secured with pressure …Read all… Posted on 21 February 2026 by ScegliAuto 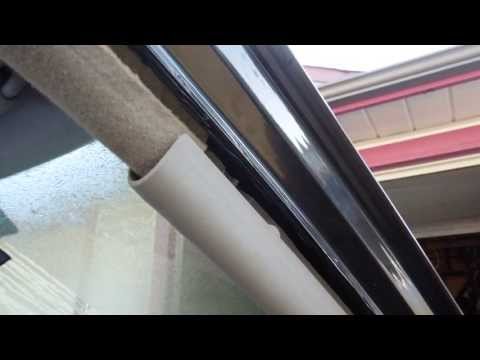 Mazda 3 (2003-2009 / BK, MK 1)
Removing the Windscreen Pillar Trim To remove the plastic trim of the windscreen pillar, note that the pillar is secured with two push clips (one at the bottom and one at the top) and is held in …Read all… Posted on 11 February 2026 by ScegliAuto Dashboard Mazda 3 (2013-2019 / bn, mk 3, bm)
Mazda 3 (2013-2019 / BN, MK 3, BM)How to Remove the Centre Console of the Mazda 3 Today, you will learn how to remove the upper and lower centre console of the Mazda 3. For this simple operation, no special tools are required, such as a …Read all… Posted on 10 February 2026 by ScegliAuto
Mazda 3 (2019-2026 / MK 4, BP)Where is the OBD port located on the Mazda 3? To locate the OBD port inside your Mazda 3, you do not need to remove any components. All you have to do is carefully read the following guide and follow all …Read all… Posted on 6 December 2024 by ScegliAuto
Mazda 3 (2003-2009 / BK, MK 1)Instructions for Removing Instrument Cluster To remove the instrument cluster, it is necessary to remove some trim elements from the dashboard: start by detaching the central trim secured with pressure …Read all… Posted on 21 February 2026 by ScegliAuto
Mazda 3 (2003-2009 / BK, MK 1)Removing the Windscreen Pillar Trim To remove the plastic trim of the windscreen pillar, note that the pillar is secured with two push clips (one at the bottom and one at the top) and is held in …Read all… Posted on 11 February 2026 by ScegliAuto Dashboard Mazda 3 (2003-2009 / bk, mk 1)
Mazda 3 (2013-2019 / BN, MK 3, BM)How to Remove the Centre Console of the Mazda 3 Today, you will learn how to remove the upper and lower centre console of the Mazda 3. For this simple operation, no special tools are required, such as a …Read all… Posted on 10 February 2026 by ScegliAuto
Mazda 3 (2019-2026 / MK 4, BP)Where is the OBD port located on the Mazda 3? To locate the OBD port inside your Mazda 3, you do not need to remove any components. All you have to do is carefully read the following guide and follow all …Read all… Posted on 6 December 2024 by ScegliAuto
Mazda 3 (2003-2009 / BK, MK 1)Instructions for Removing Instrument Cluster To remove the instrument cluster, it is necessary to remove some trim elements from the dashboard: start by detaching the central trim secured with pressure …Read all… Posted on 21 February 2026 by ScegliAuto
Mazda 3 (2003-2009 / BK, MK 1)Removing the Windscreen Pillar Trim To remove the plastic trim of the windscreen pillar, note that the pillar is secured with two push clips (one at the bottom and one at the top) and is held in …Read all… Posted on 11 February 2026 by ScegliAuto Cigarette lighter (1) Airbag (9) Alternator (3) Speaker (3) Shocks (7) Air conditioning (5) Car stereo (8) Anti-roll bar (1) Battery (6) Air vents (1) Spark plugs (8) Body (4) Key (37) V-belt (2) Onboard computer (6) Checks and maintenance (21) Throttle body (1) Dashboard (4) Shifter boot (1) Brake rotors (2) Headlight (6) Tail light (5) Fog lights (4) Air filter (7) Cabin air filter (11) Fuel filter (3) Diesel fuel filter (3) Oil filter (3) Parking brake (2) Grille (1) Fuel injectors (1) Accessory kit (11) Xenon headlight kit (1) Light bulb (6) Side marker bulb (2) Headlight bulb (16) Tail light bulb (6) Interior dome light bulb (3) Antifreeze coolant (2) License plate light (1) Handle (6) Engine (1) Transmission fluid (2) Brake fluid (1) Engine oil (14) Power steering fluid (1) Clock (15) Door trim panel (6) Front bumper (8) Rear bumper (2) Brake pads (6) Tires (2) Shift knob (4) Pump (1) Instrument cluster (3) Radiator (1) Fuse box (36) Seat (4) Engine coolant temperature sensor (3) Side mirror (12) Rearview mirror (1) Warning light – error code (17) (23) Tire pressure warning light (7) Service warning light (70) Manufacturer emblem (1) Engine mount (1) Fuel cap (4) Windshield wipers (4) Center console tunnel (2) Valve (1) Blower motor (3) Steering wheel (1) |
Location of the Jack and Spare Wheel of the Toyota Yaris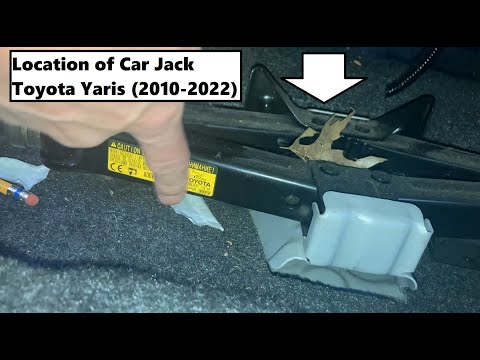
In the unfortunate event that one of the wheels of the Toyota Yaris is punctured, it is useful to know the location of the lifting jack, the spare wheel, the tool to operate the jack, and to unscrew the wheel bolts. The jack is located under the driver's seat, secured to a bracket and protected by a plastic cover, which you can remove by acting on the fixing clips. The spare wheel is located under the floor panel of the boot, secured to the floor by a threaded plastic flange, alongside which you will find the tool, consisting of a bent bar, which is used to operate the jack on one side and to remove the wheel on the other. by ScegliAuto More videos
|
|
For advertising on this site Write to info@scegliauto.com
ScegliAuto is not responsible for any inaccuracy of the data in the lists. To report any inaccuracy or your business (if you own the business in question), please write to info@scegliauto.com
Number of seconds to generate the page: 0.015
(c) ScegliAuto 2026 - info@scegliauto.com - Privacy policy VAT number: IT01247470535 |
