
|
Do it yourself
| |||
| ||||


Nissan Micra Years 2002-2010 (K12)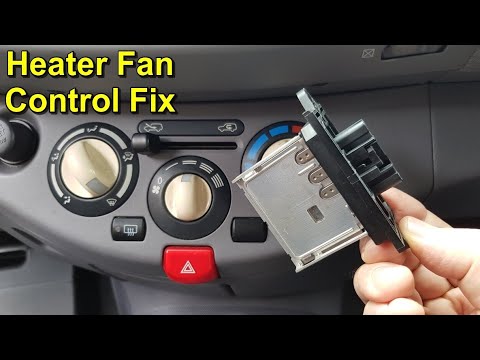 Nissan Micra (2002-2010 / K12)
Where is the heating resistor located in the Nissan Micra? In this video we can see where the heating resistor is located in the Nissan Micra and how to proceed in case we need to replace it, an extremely simple and …read all… Posted on 29 April 2024 by ScegliAuto 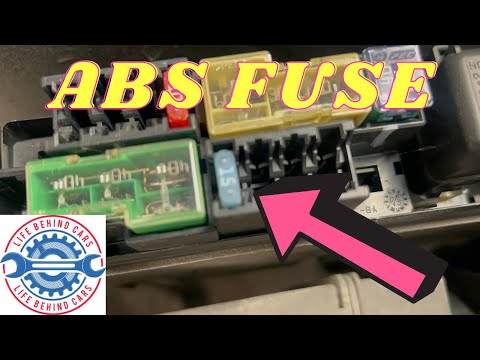 Nissan Micra (2002-2010 / K12)
Where is the fuse box of the Nissan Micra 2005 located? Fortunately, the box containing all the various fuses for your 2005 Nissan Micra is easily identifiable in a few seconds and thanks to the procedure described …read all… Posted on 18 April 2024 by ScegliAuto 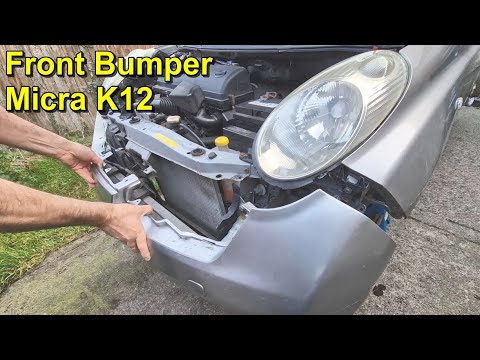 Nissan Micra (2002-2010 / K12)
How to remove the front bumper of the Nissan Micra Today we will see the instructions that will allow us to disassemble and replace the front bumper of the Nissan Micra, in simple steps. First of all, we open …read all… Posted on 15 April 2024 by ScegliAuto 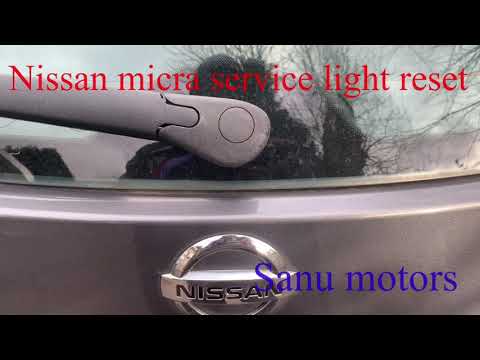 Nissan Micra (2002-2010 / K12)
Service reset of the Nissan Micra K12 The appearance of a wrench-shaped icon on the Nissan Micra's display reminds us that we need to replace the engine oil. After completing all the operations …read all… Posted on 30 March 2024 by ScegliAuto  Nissan Micra (2002-2010 / K12)
How to reset the maintenance of the 2007 Nissan Micra In this article, we will analyze the procedure for resetting the maintenance light on a 2007 Nissan Micra. We recommend performing this procedure only after …read all… Posted on 29 March 2024 by ScegliAuto 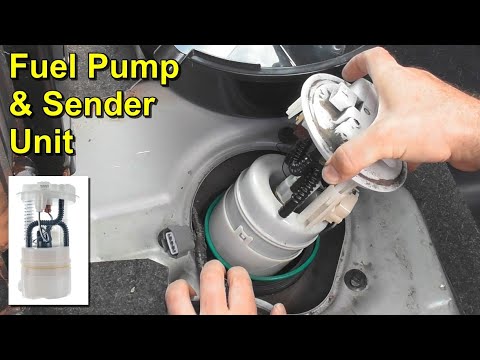 Nissan Micra (2002-2010 / K12)
How to replace the fuel pump of the Nissan Micra Today's guide will explain the process of disassembling and replacing the fuel pump of the Nissan Micra. First, we open the rear doors and start disassembling …read all… Posted on 26 March 2024 by ScegliAuto 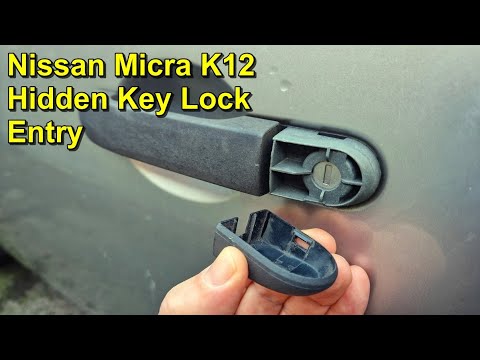 Nissan Micra (2002-2010 / K12)
How to open the door of the Nissan Micra with a dead remote control? In this tutorial, we can see how to open the door of the Nissan Micra in case of a complete battery discharge of the remote control, an extremely simple and …read all… Posted on 17 March 2024 by ScegliAuto 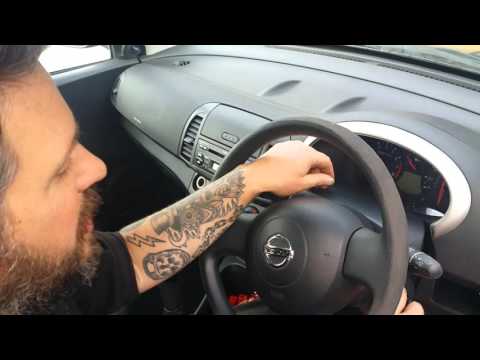 Nissan Micra (2002-2010 / K12)
How do you reset the Service light on the Nissan Micra? In order to reset the Service light of the Nissan Micra, you need to press and hold the button located on the right side of the instrument panel: you will need …read all… Posted on 28 February 2024 by ScegliAuto  Nissan Micra (2002-2010 / K12)
How to replace the timing belt of the Nissan Micra The replacement of the timing belt on a Nissan Micra model K12 follows simple steps that can be done independently. The first steps are to open the front hood …read all… Posted on 26 February 2024 by ScegliAuto 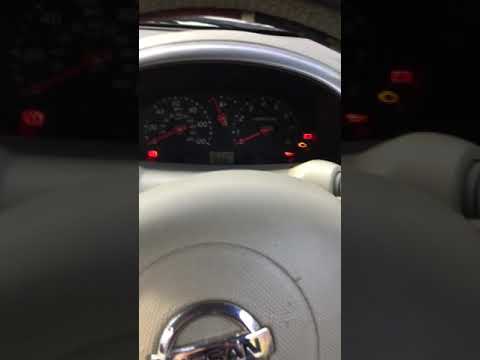 Nissan Micra (2002-2010 / K12)
How to reset the service light on the Nissan Micra Restoring the service light of the 2004 Nissan Micra is a very simple operation that can be done independently, thanks to our video tutorial. To perform the …read all… Posted on 26 February 2024 by ScegliAuto  Nissan Micra (2002-2010 / K12)
How to remove the airbag cover on the Nissan Micra Here is a general guide on how to remove the steering wheel cover in the Nissan Micra. Keep in mind that specific details may vary between different models and …read all… Posted on 19 February 2024 by ScegliAuto 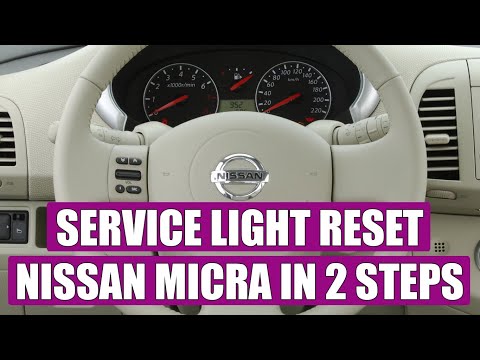 Nissan Micra (2002-2010 / K12)
How to reset the service light on the Nissan Micra? In this tutorial, we can see how to reset the service in the Nissan Micra, an extremely simple and quick operation, to be done only once all the required …read all… Posted on 6 February 2024 by ScegliAuto 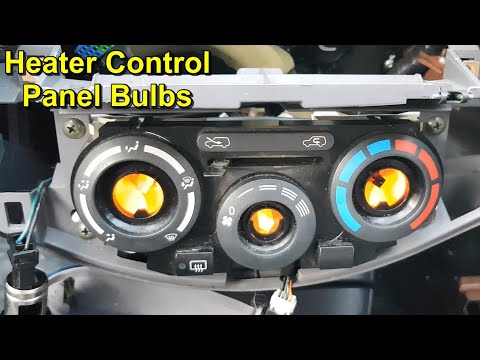 Nissan Micra (2002-2010 / K12)
Replacement of the control panel lights for the air conditioning in the Nissan Micra K12. In this video, we see how to proceed to replace the bulbs that illuminate the controls of the air conditioning in a Nissan Micra K12. We remove the car radio …read all… Posted on 5 February 2024 by ScegliAuto 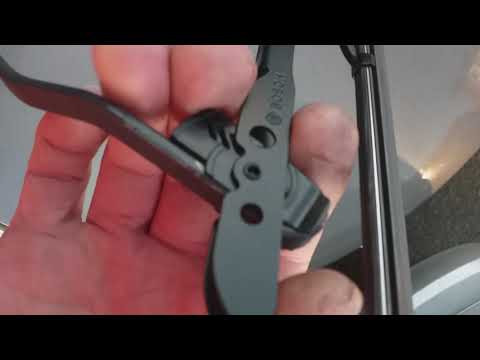 Nissan Micra (2002-2010 / K12)
How do you replace the windshield wiper blades of the Nissan Micra? In order to replace the windshield wiper blades of the Nissan Micra, you need to lift the wiper arms so that the blades are no longer in contact with the …read all… Posted on 27 January 2024 by ScegliAuto 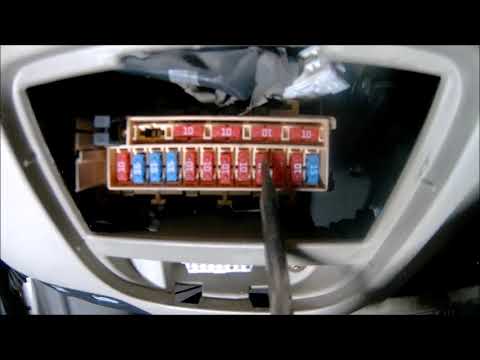 Nissan Micra (2002-2010 / K12)
Where is the fuse box located in the 2004 Nissan Micra? The 2004 Nissan Micra has two fuse boxes inside. The first fuse box is located inside the front hood, specifically near the battery. The second fuse box is …read all… Posted on 24 January 2024 by ScegliAuto 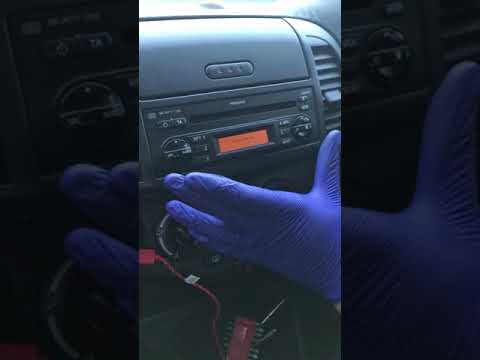 Nissan Micra (2002-2010 / K12)
How to enter the radio unlock code in the Nissan Micra? In this tutorial, we can see how to enter the unlock code for the car radio in the Nissan Micra, an extremely simple and quick operation to be performed, for …read all… Posted on 21 January 2024 by ScegliAuto 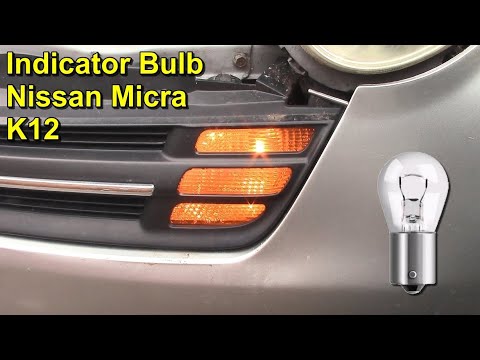 Nissan Micra (2002-2010 / K12)
How to change the front turn signal bulb of the Nissan Micra k12. In this video, we see how to change the front turn signal bulb on the Nissan Micra k12: first, we need to remove the two rivets at the top of the plastic …read all… Posted on 19 January 2024 by ScegliAuto 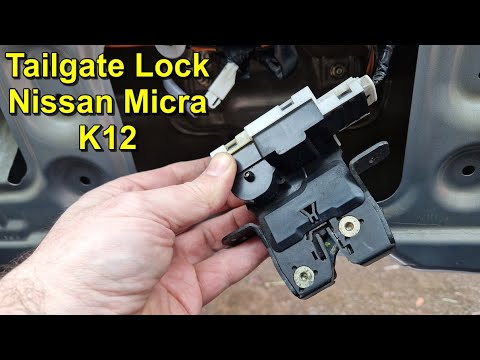 Nissan Micra (2002-2010 / K12)
How do you replace the rear hatch lock of the Nissan Micra? The replacement of the rear door lock of the Nissan Micra is done by opening the door, so that the internal plastic panel can be located: this must be detached …read all… Posted on 11 January 2024 by ScegliAuto  Nissan Micra (2002-2010 / K12)
Localization and fuse diagram for Nissan Micra K12 In this video, we can see the fuse diagrams of the Nissan Micra K12, which are located in the passenger compartment, in a compartment that is situated in the …read all… Posted on 3 January 2024 by ScegliAuto 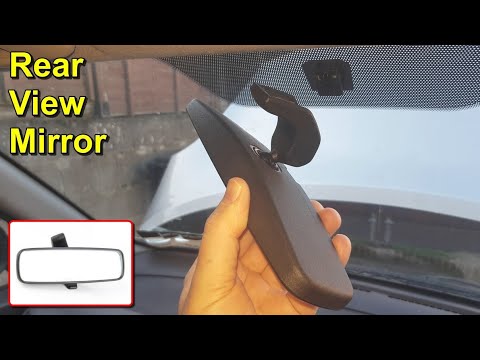 Nissan Micra (2002-2010 / K12)
How do you replace the interior rearview mirror of the Nissan Micra? The replacement of the internal rearview mirror of the Nissan Micra is done by grabbing the old mirror and levering it so that it is released from its fixing …read all… Posted on 23 December 2023 by ScegliAuto |
See also:
Handbrake adjustment on Ford Ecosport
First remove the plastic profile at the base of the gear lever. To do this, slightly widen the side edges and carefully lift it to release it. There is no need to remove it completely, just move it forward to avoid bother. Now remove the plastic center console around the handbrake by first working from the rear to release it and lifting it until the brake lever passes. Also in this case it is not necessary to remove it completely but, paying attention to the connected cables, it can be stowed in front of the passenger seat. At this point we notice that at the base of the handbrake lever, on the front, we find a nut. By acting on it, with a 10 wrench, we can adjust the brake force, increasing it by turning the nut clockwise, or decreasing it by turning it counterclockwise. Once adjusted, the center console can be repositioned first, pressing lightly to engage it, and then the profile of the gearbox base. by ScegliAuto More videos
|
|
For advertising on this site Write to info@scegliauto.com
ScegliAuto is not responsible for any inaccuracy of the data in the lists. To report any inaccuracy or your business (if you own the business in question), please write to info@scegliauto.com
Number of seconds to generate the page: 0.038
(c) ScegliAuto 2024 - info@scegliauto.com - Privacy Policy VAT number: IT01247470535 |