
|
Do it yourself
| |||
| ||||


Mazda 6 - Accessory kitAccessory Kit Mazda 6 (2008-2012 / gh, mk 2) Mazda 6 (2002-2008 / GG, MK 1)
Replacing the Air Intake Sensor Release and lift the bonnet to proceed with removing the upper engine cover by pulling it from the clips. Now disconnect the plugs connected to the sensors in …Read all… Posted on 8 March 2026 by ScegliAuto  Mazda 6 (2002-2008 / GG, MK 1)
Replacing the Horn Open and lift the bonnet and disconnect the negative terminal from the battery. Next, remove the bolts securing the front bumper, both at the top and bottom. …Read all… Posted on 7 March 2026 by ScegliAuto  Mazda 6 (2002-2008 / GG, MK 1)
How to Add an AUX Input to Your Car Radio Adding an AUX output to your car radio means you can connect any device that has a minijack output. This can be useful for listening to music or connecting …Read all… Posted on 15 February 2026 by ScegliAuto  Mazda 6 (2002-2008 / GG, MK 1)
Installing an Interface on a Standard Car Radio This video shows how to install an interface on a standard car radio. First, unscrew the gear knob and position it in R, remove the cup holder and the gear …Read all… Posted on 14 February 2026 by ScegliAuto  Mazda 6 (2002-2008 / GG, MK 1)
How to Connect a Bluetooth Kit In this guide, you will learn how to install a Bluetooth kit in a car. First, detach the plastic cover beneath the steering wheel that is clipped in place and …Read all… Posted on 14 February 2026 by ScegliAuto  Mazda 6 (2002-2008 / GG, MK 1)
Kit for Modifying the Engine Air Intake To perform the modification, you need to obtain the complete kit. Start by disconnecting the negative terminal of the battery, then disconnect the connector of …Read all… Posted on 12 February 2026 by ScegliAuto 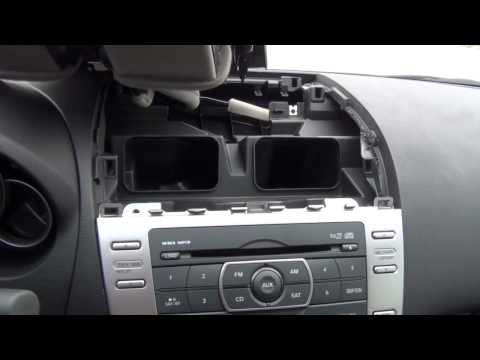 Mazda 6 (2008-2012 / GH, MK 2)
Installing Aux Adapter Accessory Kit and Removing Car Radio To install an Aux input, it is necessary to remove the car radio to which the kit's control unit and the corresponding output cable will be connected. Start by …Read all… Posted on 11 February 2026 by ScegliAuto
Mazda 6 (2008-2012 / GH, MK 2)Installing iPod Adapter and Removing Centre Console The video shows how to detach the plastic covers along the centre console, specifically the one near the handbrake and the one near the gear lever: both are …Read all… Posted on 4 February 2026 by ScegliAuto 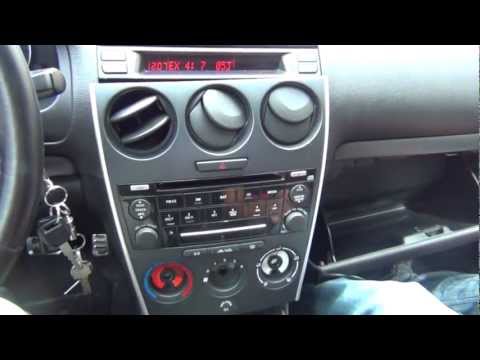 Mazda 6 (2002-2008 / GG, MK 1)
Installation of accessory adapter kit for iPhone, iPod and AUX For this installation, you need a screwdriver and a ratchet spanner with an extension, along with the accessory kit. Start by removing the gear knob by simply …Read all… Posted on 4 February 2026 by ScegliAuto Accessory Kit Mazda 6 (2002-2008 / gg, mk 1)
Mazda 6 (2002-2008 / GG, MK 1)Replacing the Air Intake Sensor Release and lift the bonnet to proceed with removing the upper engine cover by pulling it from the clips. Now disconnect the plugs connected to the sensors in …Read all… Posted on 8 March 2026 by ScegliAuto
Mazda 6 (2002-2008 / GG, MK 1)Replacing the Horn Open and lift the bonnet and disconnect the negative terminal from the battery. Next, remove the bolts securing the front bumper, both at the top and bottom. …Read all… Posted on 7 March 2026 by ScegliAuto
Mazda 6 (2002-2008 / GG, MK 1)How to Add an AUX Input to Your Car Radio Adding an AUX output to your car radio means you can connect any device that has a minijack output. This can be useful for listening to music or connecting …Read all… Posted on 15 February 2026 by ScegliAuto
Mazda 6 (2002-2008 / GG, MK 1)Installing an Interface on a Standard Car Radio This video shows how to install an interface on a standard car radio. First, unscrew the gear knob and position it in R, remove the cup holder and the gear …Read all… Posted on 14 February 2026 by ScegliAuto
Mazda 6 (2002-2008 / GG, MK 1)How to Connect a Bluetooth Kit In this guide, you will learn how to install a Bluetooth kit in a car. First, detach the plastic cover beneath the steering wheel that is clipped in place and …Read all… Posted on 14 February 2026 by ScegliAuto
Mazda 6 (2002-2008 / GG, MK 1)Kit for Modifying the Engine Air Intake To perform the modification, you need to obtain the complete kit. Start by disconnecting the negative terminal of the battery, then disconnect the connector of …Read all… Posted on 12 February 2026 by ScegliAuto
Mazda 6 (2008-2012 / GH, MK 2)Installing Aux Adapter Accessory Kit and Removing Car Radio To install an Aux input, it is necessary to remove the car radio to which the kit's control unit and the corresponding output cable will be connected. Start by …Read all… Posted on 11 February 2026 by ScegliAuto
Mazda 6 (2008-2012 / GH, MK 2)Installing iPod Adapter and Removing Centre Console The video shows how to detach the plastic covers along the centre console, specifically the one near the handbrake and the one near the gear lever: both are …Read all… Posted on 4 February 2026 by ScegliAuto
Mazda 6 (2002-2008 / GG, MK 1)Installation of accessory adapter kit for iPhone, iPod and AUX For this installation, you need a screwdriver and a ratchet spanner with an extension, along with the accessory kit. Start by removing the gear knob by simply …Read all… Posted on 4 February 2026 by ScegliAuto Airbag (2) Alternator (1) Speaker (4) Shocks (5) Air conditioning (1) Car stereo (6) Battery (4) Ignition coil (1) Air vents (1) Control arm (12) Transmission (1) Spark plugs (7) Body (2) Glove compartment (1) Key (18) Trunk lock (1) Timing belt (6) V-belt (2) Onboard computer (2) Checks and maintenance (5) Throttle body (1) Dashboard (3) Bearing (5) Brake rotors (5) Headlight (4) Tail light (1) Diesel particulate filter (1) Air filter (1) Cabin air filter (12) Fuel filter (1) Diesel fuel filter (2) Oil filter (1) Grille (3) Fuel injectors (1) Window switch (1) Accessory kit (9) Light bulb (3) Side marker bulb (2) Headlight bulb (8) Interior dome light bulb (3) Handle (2) Engine (2) Power window motor (2) Starter motor (1) Engine oil (5) Clock (5) Door trim panel (4) Front bumper (3) Rear bumper (3) Brake pads (4) Hydraulic pistons (1) Tires (2) Pump (2) Fuel pump (1) Instrument cluster (1) Radiator (1) Wheel (4) Fuse box (20) Axle shaft (1) Door lock (1) Oxygen sensor (1) Side mirror (4) Rearview mirror (1) Warning light – error code (13) (13) Tire pressure warning light (2) Service warning light (44) Windshield wipers (3) Thermostat (3) Cylinder head (1) Windshield washer nozzle (1) Valve (3) EGR valve (1) Blower motor (1) Steering wheel (2) |
How to Remove the Headrests from a Fiat Panda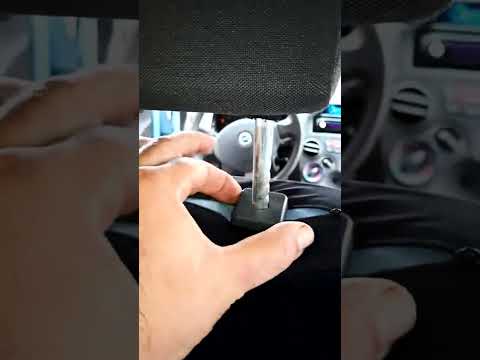
Below are the instructions to remove the headrests, both front and rear, from the Fiat Panda. First, get inside the vehicle and press and hold the side button located at the base of the headrest. Then, while holding the button, pull the headrest upwards to remove it, as shown in the video. At this point, perform the same operation on the other headrests. Now, simply insert them back in while holding the button, and finally adjust the height of all the headrests! by ScegliAuto More videos
|
|
For advertising on this site Write to info@scegliauto.com
ScegliAuto is not responsible for any inaccuracy of the data in the lists. To report any inaccuracy or your business (if you own the business in question), please write to info@scegliauto.com
Number of seconds to generate the page: 0.009
(c) ScegliAuto 2026 - info@scegliauto.com - Privacy policy VAT number: IT01247470535 |
