
|
Do it yourself
| |||
| ||||


1994-2000 Toyota Rav 4 (MK 1, Xa10)
Tutorial - For model years: 1994, 1995, 1996, 1997, 1998, 1999, 2000
Mechanics (15)Electrical System and Lighting (6)Air Conditioning and Cooling (2) Toyota Rav 4 (1994-2000 / MK 1, Xa10) Where is the fuse box of the Toyota RAV4 engine located? If you are looking for a simple and effective guide to help you find the fuse box of the engine of your first generation Toyota RAV4, then all you have to do …Read all… Posted on 13 July 2025 by ScegliAuto  Toyota Rav 4 (1994-2000 / MK 1, Xa10) How to Replace the Clutch on a Toyota RAV 4? To replace the clutch on a Toyota RAV 4, loosen the bolts securing the gearbox to its housing at the bottom of the engine bay. Once done, disconnect the …Read all… Posted on 1 November 2026 by ScegliAuto  Toyota Rav 4 (1994-2000 / MK 1, Xa10) How to Replace the Timing Belt of the Toyota RAV 4 On the Toyota RAV 4, the timing belt can be replaced by opening the bonnet and accessing the components located on the left side of the engine block: here you …Read all… Posted on 8 October 2026 by ScegliAuto  Toyota Rav 4 (1994-2000 / MK 1, Xa10) How to Replace the Timing Belt on a Toyota RAV 4? To replace the timing belt on a Toyota RAV 4, lift the vehicle using a jack or ramp to remove the right front wheel and the inner cover of the wheel arch. Once …Read all… Posted on 5 October 2026 by ScegliAuto  Toyota Rav 4 (1994-2000 / MK 1, Xa10) Where is the fuel pump located in the Toyota RAV4? In this video, you can see where the fuel pump is located in the Toyota RAV4 and how to proceed if you need to replace it, a very simple operation. As shown, …Read all… Posted on 30 September 2026 by ScegliAuto  Toyota Rav 4 (1994-2000 / MK 1, Xa10) How to replace the timing belt on a Toyota RAV 4? To replace the timing belt on a Toyota RAV 4, open the bonnet to access the left side of the engine block. Then, loosen the bolts securing the front right …Read all… Posted on 25 September 2026 by ScegliAuto  Toyota Rav 4 (1994-2000 / MK 1, Xa10) What is the Fuse Diagram for the Toyota RAV4? In this video, you can see the fuse diagrams for the Toyota RAV4 and the location of the respective boxes, useful in case you need to check the fuse of a …Read all… Posted on 18 September 2026 by ScegliAuto  Toyota Rav 4 (1994-2000 / MK 1, Xa10) How to Replace the Timing Belt on a Toyota RAV 4? To replace the timing belt on a Toyota RAV 4, you need to remove the engine from its bay to access the left side of the engine block. Here, remove the plastic …Read all… Posted on 25 August 2026 by ScegliAuto  Toyota Rav 4 (1994-2000 / MK 1, Xa10) Replacing the front headlight on a Toyota Rav-4 If you find that the front headlight bulb on your Toyota Rav4 has blown, replace it as soon as possible. To do this, open the bonnet and position yourself in …Read all… Posted on 24 August 2026 by ScegliAuto  Toyota Rav 4 (1994-2000 / MK 1, Xa10) How to Replace the Timing Belt on a Toyota RAV4? To replace the timing belt on a Toyota RAV4, lift the vehicle using a jack or ramp to completely remove the front right wheel and its wheel arch. Once these …Read all… Posted on 17 August 2026 by ScegliAuto  Toyota Rav 4 (1994-2000 / MK 1, Xa10) How to Replace the Timing Belt and Water Pump on the Toyota RAV 4 Today, we will go through the instructions for removing and replacing the timing belt on the Toyota RAV 4. First, lift the vehicle and start by removing the …Read all… Posted on 26 October 2026 by ScegliAuto  Toyota Rav 4 (1994-2000 / MK 1, Xa10) Where Are the Fuses in the Toyota Rav 4? In the Toyota Rav 4, there are two fuse boxes containing all the fuses in the vehicle. The first is located inside the cabin, at the lower left part of the …Read all… Posted on 25 September 2026 by ScegliAuto  Toyota Rav 4 (1994-2000 / MK 1, Xa10) Where is the Starter Motor Fuse in a Toyota RAV4? If the starter motor of your Toyota RAV4 suddenly stops working, first check the status of the respective fuse, the location of which is indicated in this …Read all… Posted on 12 September 2026 by ScegliAuto  Toyota Rav 4 (1994-2000 / MK 1, Xa10) What Is the Fuse Diagram for the Toyota RAV4? In this video, you can see the fuse diagram for the Toyota RAV4 and the location of the respective boxes, useful if a device is malfunctioning and you want to …Read all… Posted on 11 August 2026 by ScegliAuto  Toyota Rav 4 (1994-2000 / MK 1, Xa10) Removing the Cabin Heater Radiator from the Toyota Rav 4 MK1 In this video tutorial, follow the main instructions to remove and replace the cabin heater radiator of the first series Toyota Rav 4. First, open the bonnet …Read all… Posted on 4 August 2026 by ScegliAuto  Toyota Rav 4 (1994-2000 / MK 1, Xa10) How to Replace the Fuel Filter on a Toyota Rav 4 To replace the fuel filter on a Toyota Rav 4, open the bonnet and locate the air filter box within the engine compartment. Disconnect it from the appropriate …Read all… Posted on 30 July 2026 by ScegliAuto  Toyota Rav 4 (1994-2000 / MK 1, Xa10) Replacing the Timing Belt on the Toyota Rav4 MK1 Today we will see the necessary instructions to remove and replace the timing belt on the first series Toyota Rav4. First, open the bonnet of your car and …Read all… Posted on 4 June 2026 by ScegliAuto  Toyota Rav 4 (1994-2000 / MK 1, Xa10) Replacing the Timing Belt on a Toyota Rav 4 Learn how to replace the timing belt on a Toyota Rav 4. First, lift the front bonnet of the car, then remove the various covers on the left side. Raise the car …Read all… Posted on 18 May 2026 by ScegliAuto 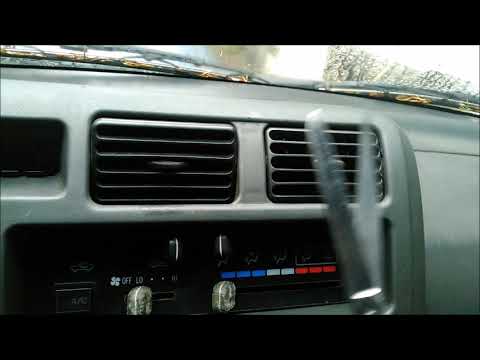 Toyota Rav 4 (1994-2000 / MK 1, Xa10) Removing Air Vents from Toyota RAV 4 In today's tutorial video, you will learn how to remove the air vents from a first-generation Toyota RAV 4, following these simple steps. The removal process …Read all… Posted on 8 May 2026 by ScegliAuto  Toyota Rav 4 (1994-2000 / MK 1, Xa10) Removing the Steering Wheel on a Rav 4 Is the steering wheel of your car worn? Do you want to replace it? Remove the steering wheel and carry out the replacement. Disconnect the battery terminals in …Read all… Posted on 26 April 2026 by ScegliAuto |
See also:
What does the red or orange zig-zag warning light mean on the Dacia Sandero?
In this video, you will learn what the warning light depicting a red or orange zig-zag on the dashboard of the Dacia Sandero means. This is a multifunction warning light; if it appears red, it is a prompt to stop as soon as possible, switch off the engine, and exit the vehicle quickly, contacting a recovery service and the Dacia Dealer. If it lights up orange, it indicates an electronic fault in the vehicle; you can continue driving, but you must reach a Dacia service centre as soon as possible. If it lights up alongside the spanner symbol, it means it is time for a service, which is due every year or 10,000 miles (whichever comes first). The service is mandatory to maintain the warranty. If it lights up together with the tyre warning light, it indicates a loss of pressure in one of the tyres. You should check all the tyres as soon as possible to identify the source of the pressure loss. If it stays on with the engine warning light, it indicates a problem with the vehicle's emissions system; if it flashes, the issue may be a component of the engine, such as the spark plugs or coil, for example. On diesel versions, it may light up alongside the glow plug symbol, indicating a related issue. If it lights up with the ESP symbol, it means there is a fault in the system that needs checking. by ScegliAuto More videos
|
|
For advertising on this site Write to info@scegliauto.com
ScegliAuto is not responsible for any inaccuracy of the data in the lists. To report any inaccuracy or your business (if you own the business in question), please write to info@scegliauto.com
Number of seconds to generate the page: 0.012
(c) ScegliAuto 2026 - info@scegliauto.com - Privacy policy - About us VAT number: IT01247470535 |
