
|
Do it yourself
| |||
| ||||


Nissan Qashqai - Video tutorial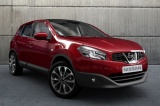
Model: Nissan Qashqai
J10
- Years 2006-2014 The Nissan Qashqai J10 has 3 fuse boxes. One is located in the cabin and is located to the left under the steering wheel, behind the cover. The other two fuse boxes are located in the engine compartment to the right of the battery. The fuse diagram for the fuse box in the cabin is as follows: R1 Auxiliary ignition circuit relay R2 Heating fan relay F1 Heated seats F2 Airbag F3 Steering column function control module F4 Electricity F5 Internal electric control unit Indoor F6 Heated external mirrors F7 12V socket (rear) F8 Electricity F9 Internal electric control unit Indoor F10 Not assigned F11 BPP switch F12 Audio system F13 Transmission control module (TCM) F14 Not assigned F15 AC fan/heater motor F16 AC fan/heater motor F17 Not assigned F18 Not assigned F19 Cigarette lighter/charging socket F20 Audio system, electric external mirrors THE FUSE BOX 1 DIAGRAM IN THE ENGINE COMPARTMENT IS AS FOLLOWS: R1 Engine coolant pump motor relay R2 Horn relay R3 Windshield washer pump relay R4 Not used FF Power steering FG Windshield washer FH Abdominals FJ Not used FK Florida ignition switch Not assigned FM Engine coolant fan motor F31 Engine coolant pump motor relay F32 All-wheel drive system F33 Atmator F34 Horn F35 Auxiliary heater F36 Not assigned F37 Auxiliary heater F38 Auxiliary heater THE FUSE BOX 2 DIAGRAM IN THE ENGINE COMPARTMENT IS AS FOLLOWS: R1 Rear window defogger relay R2 Not used R3 Not used R4 Main ignition circuit relay F41 Rear defrost, heated mirrors F42 Rear defrost, heated mirrors F43 Front fog lights F44 Windshield wipers F45 Right low beam F46 Left low beam F47 Right high beam F48 Left high beam F49 Lamp rear lights F51 Transmission F52 Engine management F53 Air conditioning compressor clutch F54 Reverse lights F55 Transmission F56 Engine management F57 Engine management F58 Engine management F59 Abdominals.
Posted on 10 June 2023 by ScegliAuto
Other guides that may interest you
|
Frequently Asked QuestionsHandbrake adjustment on Ford Ecosport
First remove the plastic profile at the base of the gear lever. To do this, slightly widen the side edges and carefully lift it to release it. There is no need to remove it completely, just move it forward to avoid bother. Now remove the plastic center console around the handbrake by first working from the rear to release it and lifting it until the brake lever passes. Also in this case it is not necessary to remove it completely but, paying attention to the connected cables, it can be stowed in front of the passenger seat. At this point we notice that at the base of the handbrake lever, on the front, we find a nut. By acting on it, with a 10 wrench, we can adjust the brake force, increasing it by turning the nut clockwise, or decreasing it by turning it counterclockwise. Once adjusted, the center console can be repositioned first, pressing lightly to engage it, and then the profile of the gearbox base. by ScegliAuto More videos
|
For advertising on this site Write to info@scegliauto.com
ScegliAuto is not responsible for any inaccuracy of the data in the lists. To report any inaccuracy or your business (if you own the business in question), please write to info@scegliauto.com
Number of seconds to generate the page: 0.107
(c) ScegliAuto 2024 - info@scegliauto.com - Privacy Policy VAT number: IT01247470535 |