
|
Do it yourself
| |||
| ||||


1995-2002 Fiat Bravo (Bravo1)
Tutorial - For model years: 1995, 1996, 1997, 1998, 1999, 2000, 2001, 2002
Mechanics (11)Air Conditioning and Cooling (3)Bodywork and Windows (2)Interior and Accessories (1)Vehicle Controls and Functions (1) Fiat Bravo (1995-2002 / Bravo1) How to Reset the Service Light on the Fiat Bravo Resetting the service light on the Fiat Bravo model 1 is a straightforward task you can do yourself after completing the required service tasks. The first step …Read all… Posted on 3 October 2026 by ScegliAuto  Fiat Bravo (1995-2002 / Bravo1) How to Remove the Steering Wheel from a Fiat Bravo To replace the steering wheel on a Fiat Bravo, loosen the screws located at the back of the steering wheel to free the airbag from its housing at the centre of …Read all… Posted on 7 October 2026 by ScegliAuto  Fiat Bravo (1995-2002 / Bravo1) How to remove the centre dashboard panel on a Fiat Bravo? To remove the centre dashboard panel on a Fiat Bravo, loosen the fastening screws located at the corners of the dashboard. Once these screws are loosened, you …Read all… Posted on 16 August 2026 by ScegliAuto
Fiat Bravo (1995-2001 / )How to Replace the Gear Lever Bush of the Fiat Bravo 1 This guide outlines the main steps to dismantle and replace the gear lever bush, which causes excessive play, in the Fiat Bravo, as well as in the Panda and …Read all… Posted on 3 August 2026 by ScegliAuto  Fiat Bravo (1995-2001 / ) Removing Cabin Filter on Fiat Bravo Want to replace the cabin air filter on the Fiat Bravo? Remove the covers in the engine bay to access the filter. The cabin filter is located in the engine …Read all… Posted on 26 April 2026 by ScegliAuto  Fiat Bravo (1995-2001 / ) Removing the External Wing Mirror on Fiat Bravo Is the wing mirror broken? Here’s how to remove and replace it on a Fiat Bravo. Use a screwdriver to pry between the edge of the mirror frame and the glass. …Read all… Posted on 8 April 2026 by ScegliAuto  Fiat Bravo (1995-2001 / ) How to Replace the Radiator of a Fiat Bravo How do you replace the radiator of a Fiat Bravo? Open the bonnet, and using a suitable socket wrench, remove the plates securing the radiator at the top. Then …Read all… Posted on 3 April 2026 by ScegliAuto  Fiat Bravo (1995-2001 / ) How to Remove the Door Panel (Driver's Side) on Fiat Bravo Let's see how to remove the door panel (driver's side) on a Fiat Bravo. Disconnect the battery terminals located in the engine bay. Use a screwdriver to …Read all… Posted on 20 March 2026 by ScegliAuto  Fiat Bravo (1995-2001 / ) Replacing the Engine Cylinder Head Gasket Let’s see how to replace the engine cylinder head gasket. Remove the alternator belt and any accessory belts (power steering, air conditioning) and unscrew …Read all… Posted on 5 March 2026 by ScegliAuto  Fiat Bravo (1995-2001 / ) Replacing the Cabin Air Filter To replace the cabin air filter, open the front bonnet and locate the filter housing just below the windscreen, on the passenger side, within the plastic trim …Read all… Posted on 3 March 2026 by ScegliAuto  Fiat Bravo (1995-2001 / ) Replacement of Rocker Cover Gasket Before applying the new gasket, thoroughly clean the respective seating both under the rocker cover and on the cylinder head: it is important to remove any …Read all… Posted on 21 February 2026 by ScegliAuto 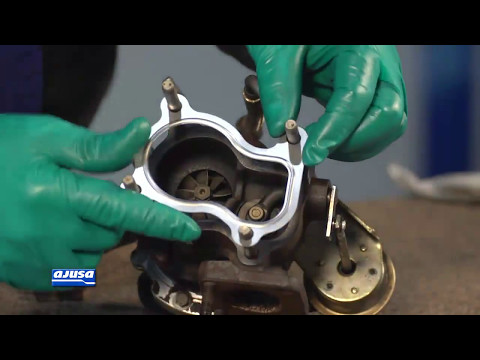 Fiat Bravo (1995-2001 / ) Turbo Gasket Replacement The turbo gasket kit also includes new studs and oil to be added to the variable geometry to ensure lubrication on first start-up, before the oil pump can …Read all… Posted on 20 February 2026 by ScegliAuto  Fiat Bravo (1995-2001 / ) Replacement of Cylinder Head Fixing Pins Before applying the new cylinder head gasket, re-thread the fixing holes on the block, choosing the correct pitch for the tap. During this operation, ensure …Read all… Posted on 19 February 2026 by ScegliAuto  Fiat Bravo (1995-2001 / ) Exhaust Manifold Gasket Replacement Before applying the new gasket to the exhaust manifold, thoroughly clean the gasket seat, removing any dirt and deposits that could compromise its adhesion and …Read all… Posted on 19 February 2026 by ScegliAuto  Fiat Bravo (1995-2001 / ) Replacing the Camshaft Oil Seal The camshaft oil seal may deteriorate, causing oil leaks that contaminate the entire timing area; replacing it is fairly straightforward, except that you will …Read all… Posted on 19 February 2026 by ScegliAuto  Fiat Bravo (1995-2001 / ) Cylinder Head Gasket in Engine Block In the engine block, the pistons of the cylinder head move up and down in cylinder holes. These pistons are connected to rods and a crankshaft that powers the …Read all… Posted on 18 February 2026 by ScegliAuto 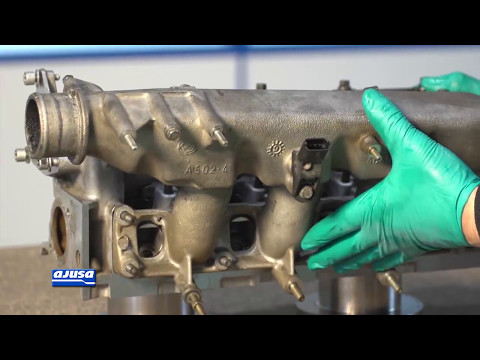 Fiat Bravo (1995-2001 / ) Replacement of Intake Manifold Gasket Before proceeding with the installation of the new intake manifold gasket, it is essential to clean the surfaces of both the manifold and the cylinder head, …Read all… Posted on 18 February 2026 by ScegliAuto  Fiat Bravo (1995-2001 / ) How to Change Oil Yourself An important operation to perform at intervals of about 9,300 miles to keep your engine efficient. Position the car on a level surface with the engine warm, …Read all… Posted on 3 February 2026 by ScegliAuto  Fiat Bravo (1995-2001 / ) Guide to Replacing the Air Filter Start by removing the screws indicated in the video to open the cover of the air filter compartment. Next, unclip the hose that leads air to the engine and …Read all… Posted on 3 February 2026 by ScegliAuto |
See also:
Resetting the Tyre Pressure Monitoring System (TPMS) Light on the Toyota Yaris
These brief and simple steps will show you how to reset the tyre pressure monitoring system (TPMS) light on the Toyota Yaris. Before resetting the light, ensure that all four tyres are at the correct operating pressure. Get inside the vehicle on the driver's side and locate the TPMS reset button found at the bottom left of the dashboard (next to the steering wheel); press and hold it until the TPMS light on the instrument cluster resets, following the video until the end! by ScegliAuto More videos
|
|
For advertising on this site Write to info@scegliauto.com
ScegliAuto is not responsible for any inaccuracy of the data in the lists. To report any inaccuracy or your business (if you own the business in question), please write to info@scegliauto.com
Number of seconds to generate the page: 0.008
(c) ScegliAuto 2026 - info@scegliauto.com - Privacy policy - About us VAT number: IT01247470535 |
