
|
Do it yourself
| |||
| ||||


2002-2007 Honda CR-V (MK 2)
Tutorial - For model years: 2002, 2003, 2004, 2005, 2006, 2007
Mechanics (21)Electrical System and Lighting (17)Air Conditioning and Cooling (5)Bodywork and Windows (4)Interior and Accessories (12)Vehicle Controls and Functions (16) Honda CR-V (2002-2007 / MK 2) How to Remove the Front Seat on the Honda CR-V In this guide, you will find the instructions to remove and detach the front seat on the Honda CR-V. First, open the front door and start unscrewing all the …Read all… Posted on 17 July 2026 by ScegliAuto  Honda CR-V (2002-2007 / MK 2) What is the fuse layout for the Honda CR-V? In this guide, you can see where the fuse boxes of the Honda CR-V are located and their respective layouts, which is useful if you need to check the fuses of a …Read all… Posted on 9 June 2026 by ScegliAuto  Honda CR-V (2002-2007 / MK 2) How to Replace the Crankshaft Position Sensor on Honda CR-V 2.4L These brief and simple steps will show you how to remove and replace the crankshaft position sensor on the Honda CR-V. First, lift the vehicle and start by …Read all… Posted on 28 March 2026 by ScegliAuto  Honda CR-V (2002-2007 / MK 2) How to Reset the Air Conditioning in the Honda CR-V? In this tutorial, we will see how to reset the air conditioning in the Honda CR-V, a very simple and quick operation, for example, as an attempt to resolve a …Read all… Posted on 20 February 2026 by ScegliAuto  Honda CR-V (2002-2007 / MK 2) What is the fuse diagram for the Honda CR-V? In this video, we can see where the fuse boxes of the Honda CR-V are located and what their diagrams are, useful in case we need to check the fuses of a …Read all… Posted on 21 January 2026 by ScegliAuto  Honda CR-V (2002-2007 / MK 2) How do you reset the Service light on the Honda CR-V? It will be possible to make the Service light completely disappear from the Honda CR-V instrument panel by holding down the button located in the bottom right …Read all… Posted on 8 November 2025 by ScegliAuto  Honda CR-V (2002-2007 / MK 2) How to reset the TPMS light on the Honda CR-V MK2 In this video, we see how to reset the TPMS light on the Honda CR-V MK2: this light is used to indicate that the tire pressure is low compared to the set …Read all… Posted on 27 March 2025 by ScegliAuto  Honda CR-V (2002-2007 / MK 2) Replacement of the license plate lights of the Honda CR-V Let's discover the information that will allow us to disassemble and replace the license plate bulbs of the Honda CR-V. First of all, let's move to the rear …Read all… Posted on 12 January 2025 by ScegliAuto  Honda CR-V (2002-2007 / MK 2) How to change the battery of the Honda CR V key In this article we will illustrate the procedure for replacing the battery of the Honda CR V remote control. For this procedure, you will need a coin and a …Read all… Posted on 29 December 2024 by ScegliAuto  Honda CR-V (2002-2007 / MK 2) What is the fuse diagram for the Honda CR-V? If any devices in your Honda CR-V have suddenly stopped working, first check the status of the relevant fuses, the diagrams for which are shown in this video. …Read all… Posted on 30 October 2026 by ScegliAuto  Honda CR-V (2002-2007 / MK 2) What is the Fuse Diagram for the Honda CR-V? In this video, you will see where the fuse boxes are located on the Honda CR-V and their respective diagrams, useful in case you need to check the fuses of a …Read all… Posted on 14 October 2026 by ScegliAuto  Honda CR-V (2002-2007 / MK 2) How to Replace the Sun Visor Mirror on the Honda CR-V Today's brief steps will guide you through the process of removing and replacing the sun visor on the Honda CR-V. First, get inside the vehicle and start by …Read all… Posted on 13 October 2026 by ScegliAuto  Honda CR-V (2002-2007 / MK 2) Where is the OBD Port on the Honda CR-V? In this mini guide, we will discover where the OBD port is located on your Honda CR-V second generation (2002-2006). Before proceeding, ensure the vehicle is …Read all… Posted on 26 September 2026 by ScegliAuto  Honda CR-V (2002-2007 / MK 2) Where is the Crankshaft Position Sensor Located on the Honda CR-V? In this video, you can see where the crankshaft position sensor is located on the Honda CR-V, useful in case you need to replace it due to a fault. As shown, …Read all… Posted on 14 September 2026 by ScegliAuto  Honda CR-V (2002-2007 / MK 2) How to Replace the Headlight Bulb of a Honda CR-V The steps to replace the headlight bulb of a Honda CR-V mk2 are very simple to perform independently. First, open the front bonnet. Second, disconnect the …Read all… Posted on 6 September 2026 by ScegliAuto  Honda CR-V (2002-2007 / MK 2) How to replace the front headlamp on a Honda CR-V In this tutorial, see how to replace the front headlamp on a second-generation Honda CR-V, produced from 2002 to 2007. To remove the old headlamp, first remove …Read all… Posted on 28 August 2026 by ScegliAuto 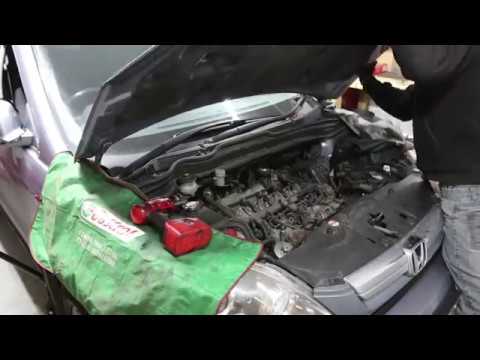 Honda CR-V (2002-2007 / MK 2) Guide to Replacing the Timing Chain on the Honda CR-V 2.2 I-CDTI Today, discover the procedure to remove and replace the timing chain on the Honda CR-V 2.2 I-CDTI. First, open the bonnet of your car and begin by removing the …Read all… Posted on 27 August 2026 by ScegliAuto  Honda CR-V (2002-2007 / MK 2) How to reset the radio in the Honda CR-V? In this tutorial, you will see how to reset the radio in the Honda CR-V, a very simple operation to perform, for example, after replacing the battery. First, …Read all… Posted on 22 August 2026 by ScegliAuto  Honda CR-V (2002-2007 / MK 2) How to Replace the Number Plate Bulb on a Honda CR-V? To replace the number plate bulb on a Honda CR-V, use a tool like a screwdriver to pry off the transparent plastic cover of the number plate light. Once this …Read all… Posted on 14 August 2026 by ScegliAuto  Honda CR-V (2002-2007 / MK 2) Fuse Box Diagram for a Honda CR-V In today's tutorial, we will show all the diagrams of the fuse boxes found within a second-generation Honda CR-V (2002-2007). The diagrams precisely indicate …Read all… Posted on 5 November 2026 by ScegliAuto |
See also:
How to Remove the Rear Seat of a Hyundai Tucson?
To remove the rear seat of a Hyundai Tucson, follow these steps. Start by moving the front seats to their most forward position to gain space. Next, locate the release lever on the underside of the rear seat, near the floor. Press this lever down while pulling the seat upwards to unlock it from the anchor pins. Once unlocked, tilt the seat upwards and forwards to remove it from its position. Repeat this process for both sides of the rear seat. Be careful of any electrical cables or components that may be connected to the seat during removal. Once the rear seat is removed, the disassembly is complete. by ScegliAuto More videos
|
|
For advertising on this site Write to info@scegliauto.com
ScegliAuto is not responsible for any inaccuracy of the data in the lists. To report any inaccuracy or your business (if you own the business in question), please write to info@scegliauto.com
Number of seconds to generate the page: 0.029
(c) ScegliAuto 2026 - info@scegliauto.com - Privacy policy VAT number: IT01247470535 |
