
|
Do it yourself
| |||
| ||||


Honda CR-V - Accessory Kit Honda CR-V (2007-2012 / MK 3)
How to replace a belt tensioner with pulley. First we need to open the front hood of the car where the engine is located, open it by pulling a lever next to the pedals on the left side, then with your …read all… Posted on 25 September 2023 by ScegliAuto  Honda CR-V (2012-2017 / MK 4)
LED headlight lights installation instructions Replacing the headlight bulbs with LED rather than xenon bulbs will give the car a more modern and attractive look as well as improve visibility; open the …read all… Posted on 24 August 2023 by ScegliAuto  Honda CR-V (2012-2017 / MK 4)
LED interior lighting installation Replacing the original bulbs with those of the LED type inside the passenger compartment will give the car a decidedly more modern and captivating appearance …read all… Posted on 22 August 2023 by ScegliAuto  Honda CR-V (2002-2007 / MK 2)
Rubber boot mat installation This video shows us how to properly install the rubber mat for our trunk. If we are afraid of dirtying or damaging the carpet of the floor of our trunk the …read all… Posted on 1 August 2023 by ScegliAuto 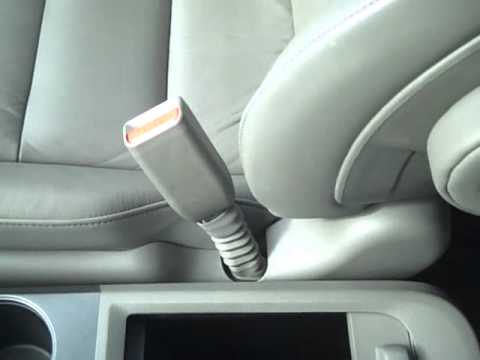 Honda CR-V (2007-2012 / MK 3)
CD magazine disassembly instructions The typical defect of the CD changer is the failure to eject the discs and reading errors: a good radio technician will know how to fix it. The CD changer is …read all… Posted on 31 July 2023 by ScegliAuto 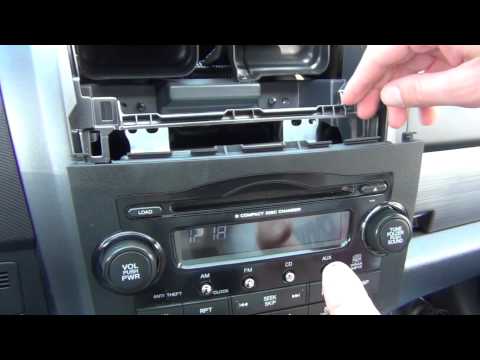 Honda CR-V (2007-2012 / MK 3)
Aux input adapter installation The installation of an adapter for inserting an Aux input to the OEM car radio requires, first of all, the disassembly of the car radio itself. Using a plastic …read all… Posted on 27 July 2023 by ScegliAuto  Honda CR-V (2007-2012 / MK 3)
Bluetooth device adapter installation Installing a bluetooth device adapter is very simple and requires no special skills or equipment. Obviously, it is necessary to remove the original car radio …read all… Posted on 26 July 2023 by ScegliAuto 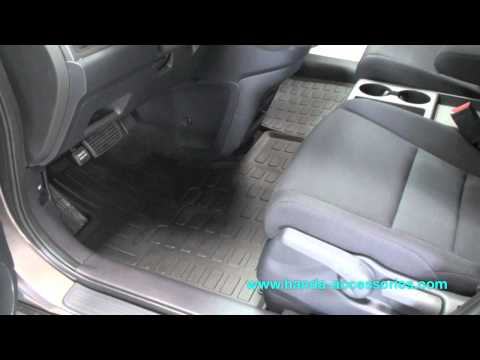 Honda CR-V (2002-2007 / MK 2)
Installation of car mats The operation described in the following guide takes about 6 minutes and has an easy level of difficulty. The installation of car mats serves to protect the …read all… Posted on 26 July 2023 by ScegliAuto 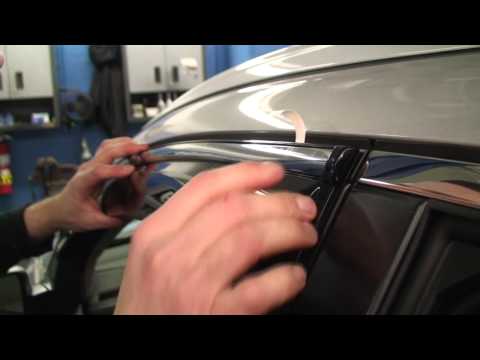 Honda CR-V (2012-2017 / MK 4)
Installing the deflectors on the door windows If you want to install flaps on the car doors, you must first of all roll down the windows completely. Then, with the aid of a spatula, the gasket comes out of …read all… Posted on 25 July 2023 by ScegliAuto 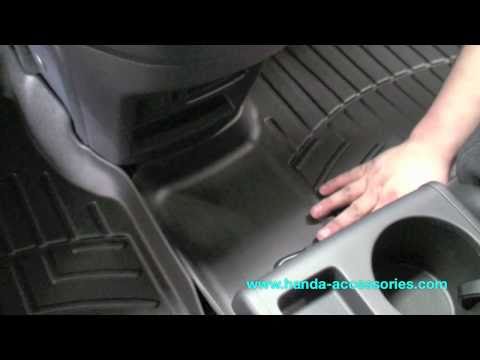 Honda CR-V (2002-2007 / MK 2)
Application of rubber mats Using rubber mats to apply on top of the original carpet ones is an absolutely clever solution; in this way, in addition to preserving the original mats from …read all… Posted on 21 July 2023 by ScegliAuto 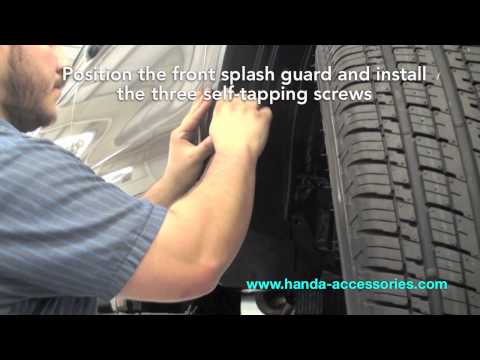 Honda CR-V (2002-2007 / MK 2)
Side splash guard installation Protections can be installed to prevent the front wheels from dirtying the car during the winter. For the modification it is necessary to obtain the original …read all… Posted on 20 July 2023 by ScegliAuto 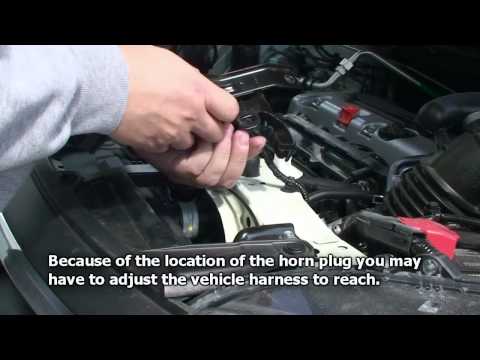 Honda CR-V (2012-2017 / MK 4)
Horn replacement The horn is of considerable importance for road safety, in case of failure it is necessary to immediately replace it. The horn is located behind the front …read all… Posted on 10 July 2023 by ScegliAuto 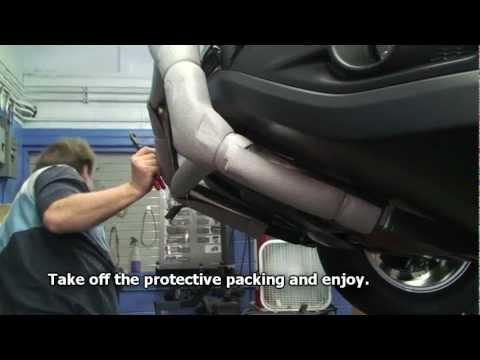 Honda CR-V (2012-2017 / MK 4)
Protection bar KIT installation. In order to better protect the front part of the car from damage, it is advisable to install an additional additional protection consisting of a steel Bull …read all… Posted on 9 July 2023 by ScegliAuto 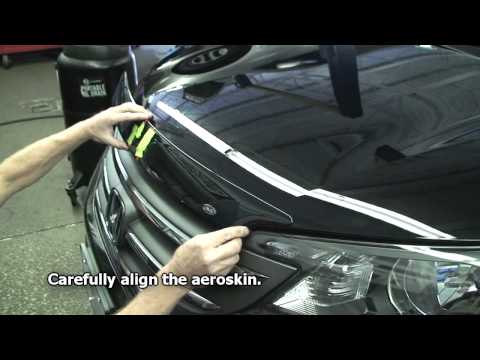 Honda CR-V (2012-2017 / MK 4)
Aeroskin installation on front hood Before proceeding with the installation, carefully clean the front part of the hood, seat of the aeroskin, with alcohol and degreaser (anti-silicone can also …read all… Posted on 6 July 2023 by ScegliAuto  Honda CR-V (2007-2012 / MK 3)
Original tow hook assembly This video dedicated to Honda's CR-V suv illustrates the procedure for mounting the original towbar. Medium difficulty work takes about an hour and a half. In …read all… Posted on 3 July 2023 by ScegliAuto  Honda CR-V (2007-2012 / MK 3)
Rear spoiler installation After purchasing the necessary kit, start marking, using the appropriate template, the points where the fixing holes will be drilled. Protect the bodywork with …read all… Posted on 2 July 2023 by ScegliAuto  Honda CR-V (2007-2012 / MK 3)
Installing the air deflector on the front hood Open the front hood and carefully clean the edge with alcohol, eliminating any residues present. Then apply the plastic inserts in the holes present under the …read all… Posted on 30 June 2023 by ScegliAuto  Honda CR-V (2012-2017 / MK 4)
Installation of the side steps For the modification it is necessary to obtain the original running boards, then position the car on a bridge and start work by removing the protective …read all… Posted on 30 June 2023 by ScegliAuto 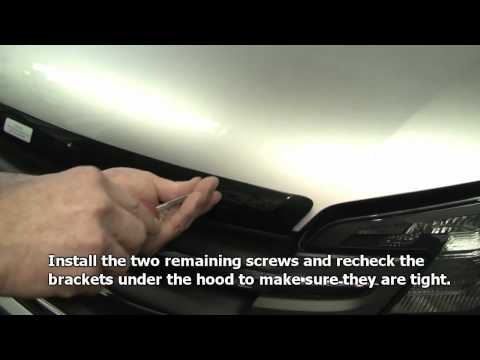 Honda CR-V (2012-2017 / MK 4)
Installing the air deflector on the front hood Open the front hood and make sure it is supported safely. Apply the rubber plugs in the square section holes inside the edge of the bonnet and carefully clean …read all… Posted on 29 June 2023 by ScegliAuto 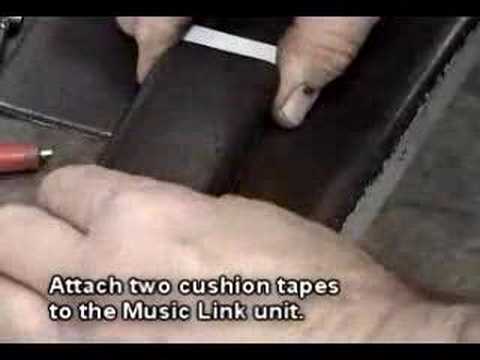 Honda CR-V (2007-2012 / MK 3)
Installation of iPod accessory kit Using a plastic tool to avoid damaging the bodywork, leverage the cover on top of the ventilation vent above the car radio to release the plastic fasteners, …read all… Posted on 29 June 2023 by ScegliAuto Airbags (2) Shock absorbers (7) Antenna (1) Car stereo (19) Anti roll bar (2) Roof Rack Bars (3) Battery (10) Coil (1) Arm (6) Spark plugs (4) Bodywork (10) Wheel rim (1) Key (14) Locking the trunk (1) Timing belt (4) -board computer (20) Checks and maintenance (49) Dashboard (5) Gearshift gaiter (1) Bearing (2) Mass air flow sensor (2) Differential (2) Brake discs (4) Headlight (8) Tail light (4) Fog lights (5) Air filter (14) Cabin air filter (14) Petrol filter (2) Diesel filter (5) Oil filter (4) Grille (2) Accessory Kit (20) Light bulb (9) Headlight bulb (8) Rear light bulb (2) Interior lights ceiling light bulb (5) Antifreeze liquid (2) Dashboard light (2) License plate light (4) Third brake light (2) Handle (2) Muffler (1) Engine (1) Window motor (1) Starter motor (1) Gear oil (2) Engine oil (13) Door panel (7) Windshield (1) Front bumper (3) Rear bumper (1) Brake pads (3) Hydraulic pistons (1) Tires (9) Gear Shift Knob (2) Pump (4) Fuel pump (2) Push button (2) Instrument cluster (16) Radiator (3) Passenger compartment heating radiator (1) Fuse box (12) Seat (1) Crankshaft RPM sensor (2) Parking sensors (2) Lock (1) Suspensions (1) Outside rearview mirror (7) Interior rearview mirror (2) Manufacturer's coat of arms (1) Windscreen wipers (12) Engine head (3) Transmission (1) Central tunnel (1) Valve (2) EGR valve (1) Interior blower (1) Side window (1) Steering wheel (6) |
Handbrake adjustment on Ford Ecosport
First remove the plastic profile at the base of the gear lever. To do this, slightly widen the side edges and carefully lift it to release it. There is no need to remove it completely, just move it forward to avoid bother. Now remove the plastic center console around the handbrake by first working from the rear to release it and lifting it until the brake lever passes. Also in this case it is not necessary to remove it completely but, paying attention to the connected cables, it can be stowed in front of the passenger seat. At this point we notice that at the base of the handbrake lever, on the front, we find a nut. By acting on it, with a 10 wrench, we can adjust the brake force, increasing it by turning the nut clockwise, or decreasing it by turning it counterclockwise. Once adjusted, the center console can be repositioned first, pressing lightly to engage it, and then the profile of the gearbox base. by ScegliAuto More videos
|
|
For advertising on this site Write to info@scegliauto.com
ScegliAuto is not responsible for any inaccuracy of the data in the lists. To report any inaccuracy or your business (if you own the business in question), please write to info@scegliauto.com
Number of seconds to generate the page: 0.016
(c) ScegliAuto 2024 - info@scegliauto.com - Privacy Policy VAT number: IT01247470535 |